I made this tutorial on clean machine just after installing Windows 10 Pro (64bit) on 2020-02-16.
Installing everything took around 1 hour.
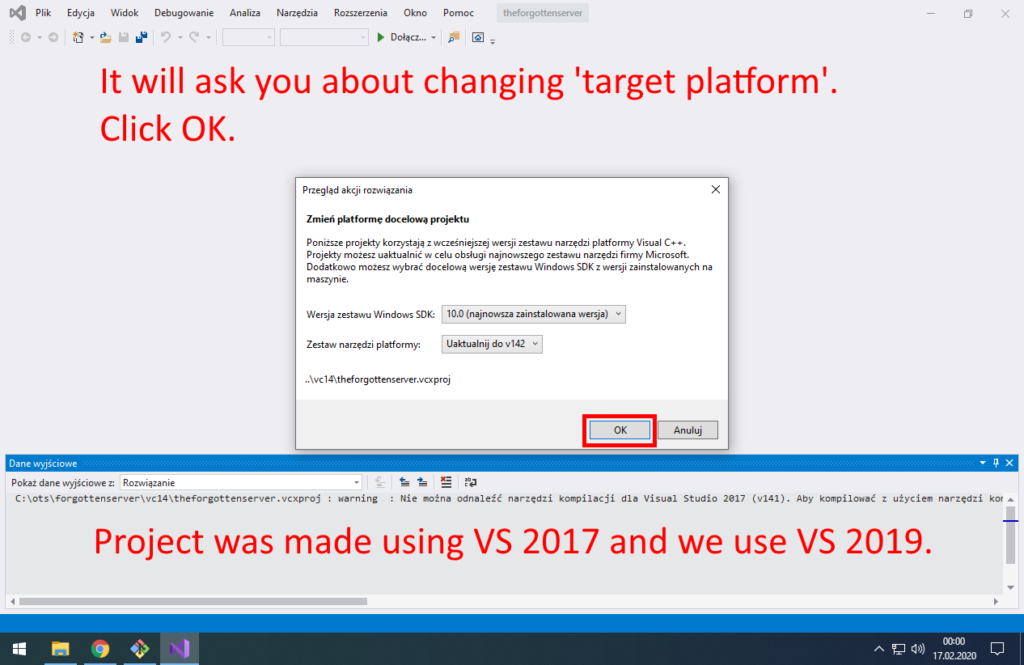
In this tutorial we will use Visual Studio 2019, not 2017 recommended for TFS compilation. It will work!
What do you need before start?
- Windows 10
- Web Browser (tutorial created with Google Chrome)
What will you have after completing this tutorial?
- GIT client integrated with Windows 10
- ‘linux console’ integrated with Windows 10
- Visual Studio 2019 Community with C++ dev tools – IDE that let you compile TFS/OTClient easily (generate ‘.exe’ file)
- vcpkg – C++ Library Manager for Windows, it will let you compile TFS/OTClient without searching for C++ libraries for hours
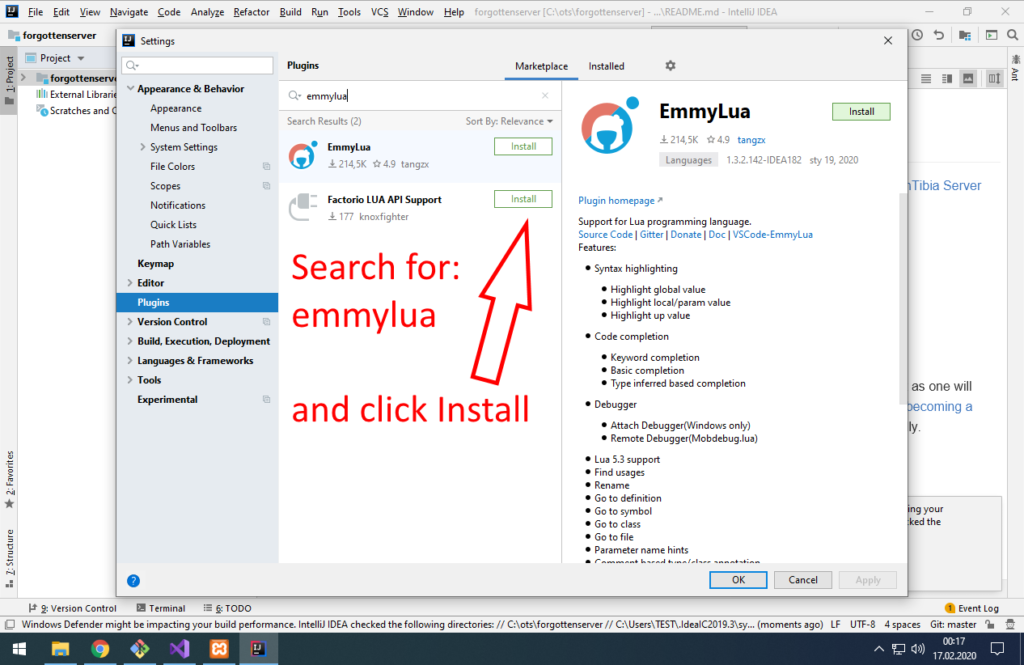
- IDEA Community Edition with EmmyLUA plugin – free version of IDE that let you manage ‘data’ folder easily (XML and LUA files)
- MariaDB database, PHP 7.4 and Apache2 server – website for your OTS
- The Forgotten Server 1.2+ running on your PC
- Gesior2012 for TFS 1.2+ running on your PC
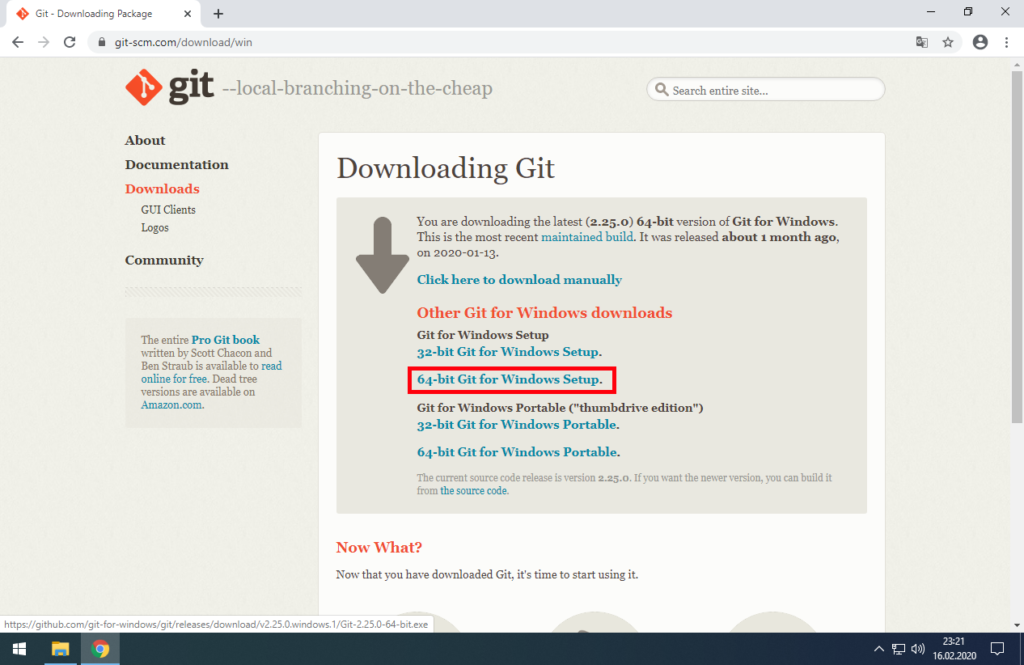
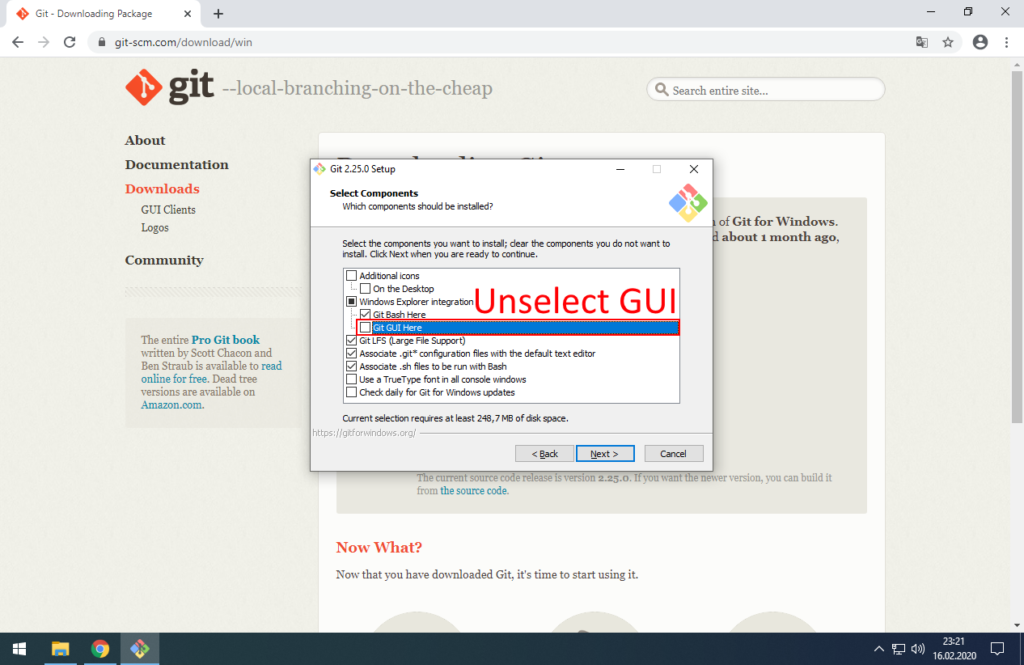
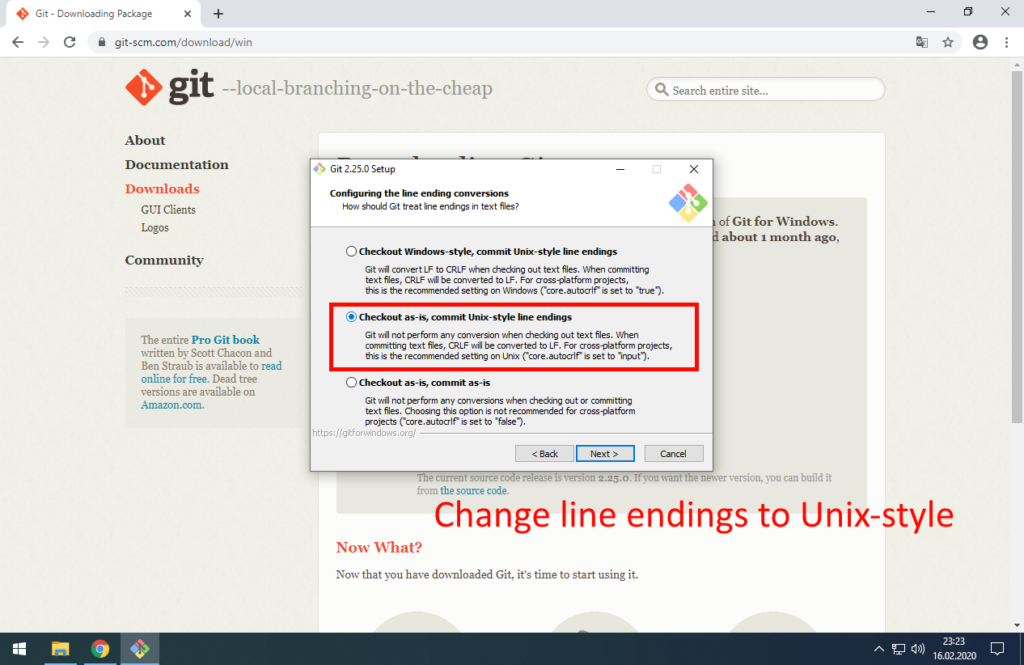
1. Install GIT for Windows with environment integration
Download it from site (version 64-bit Setup): https://git-scm.com/download/win
‘Setup’ version will integrate Git with Windows explorer.
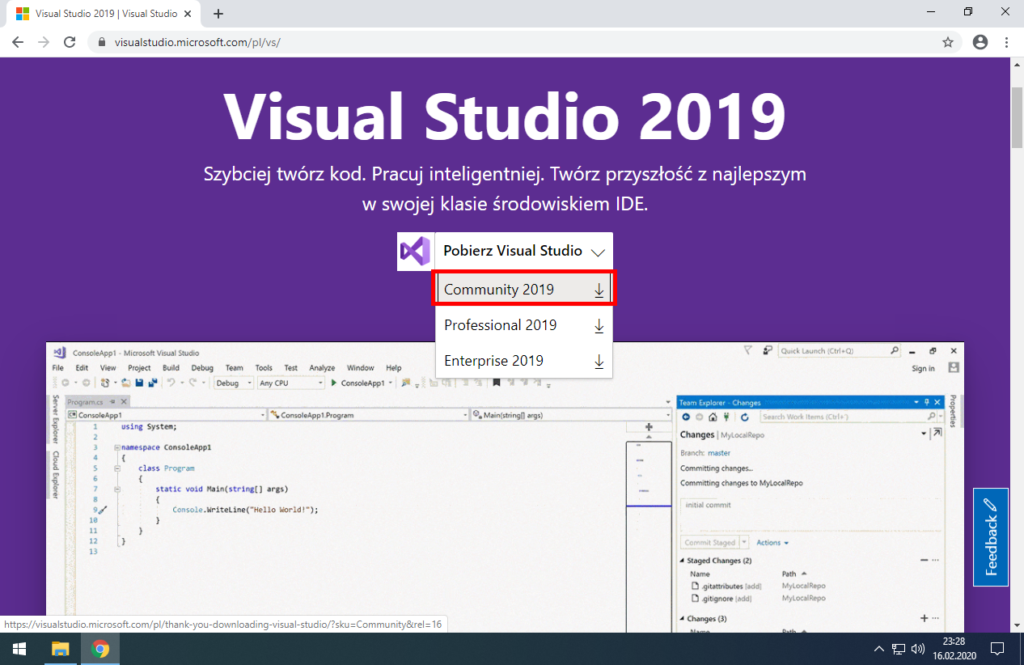
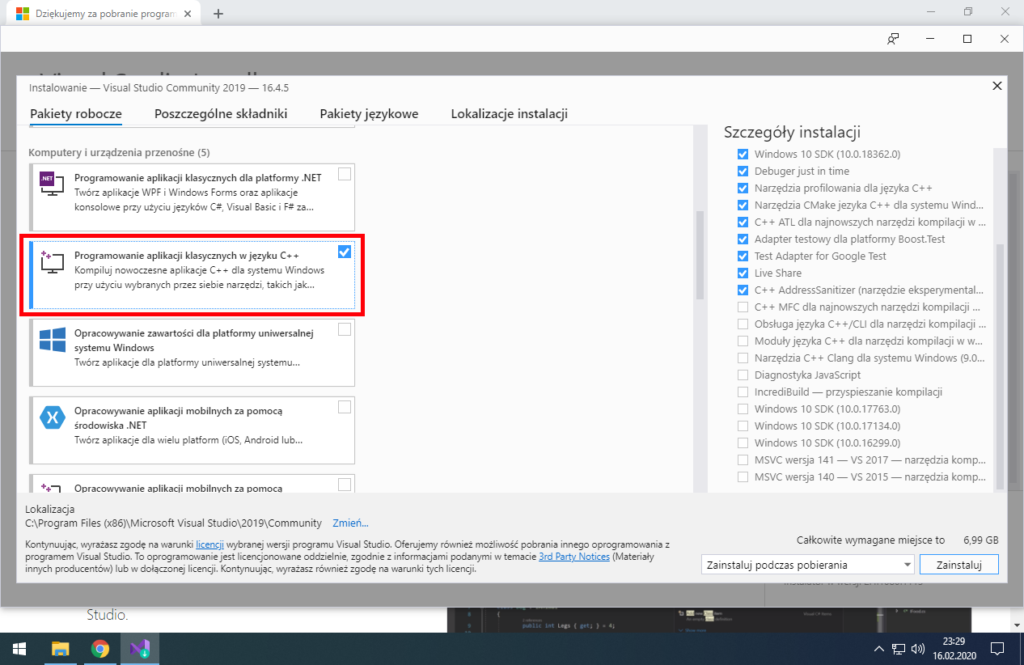
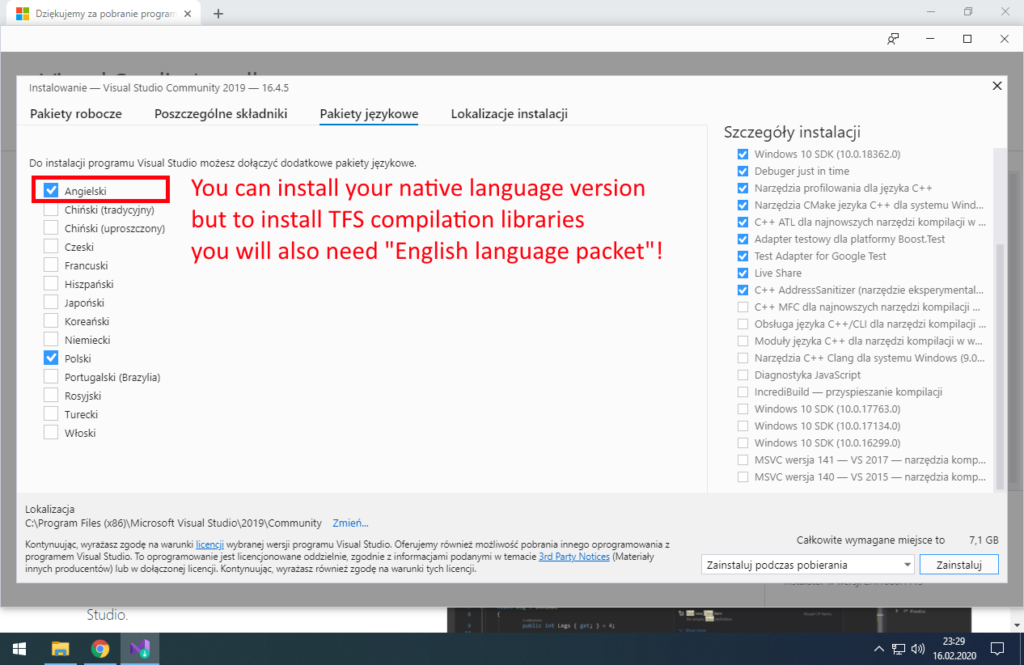
2. Install Visual Studio 2019 Community with C++
Download it from site: https://visualstudio.microsoft.com/vs/
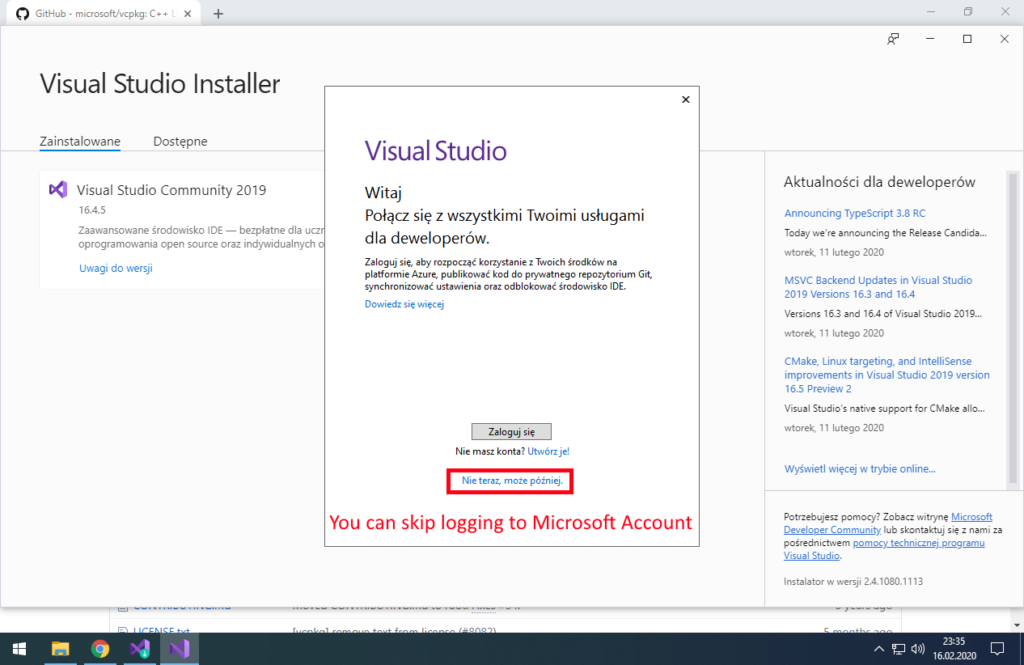
You don’t need Microsoft Account to use it. Click ‘Not now, maybe later’.
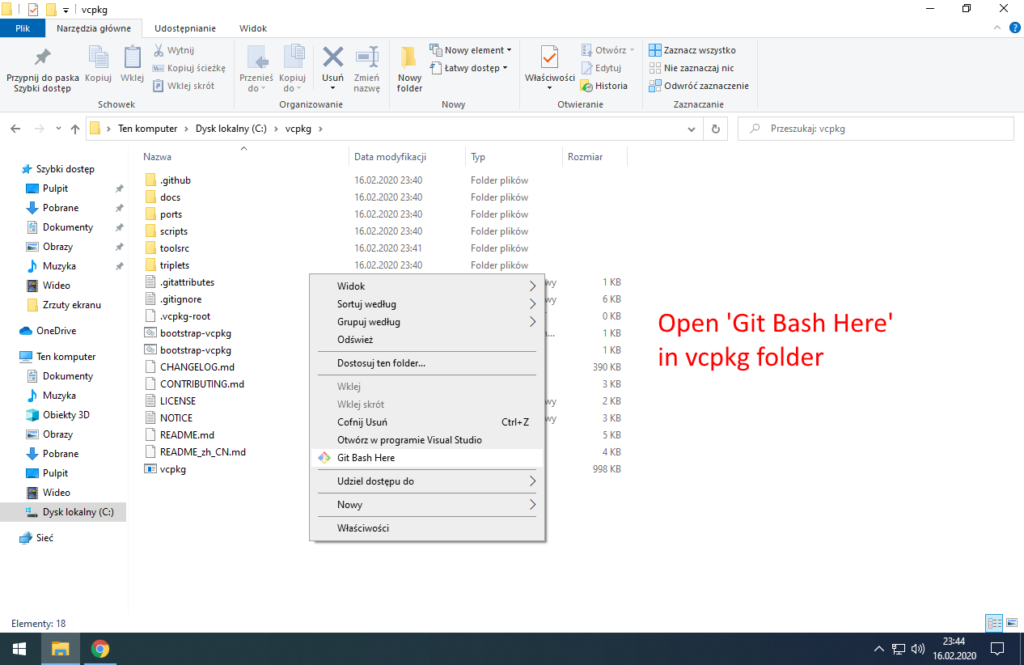
3. Install vcpkg – C++ library manager for Windows
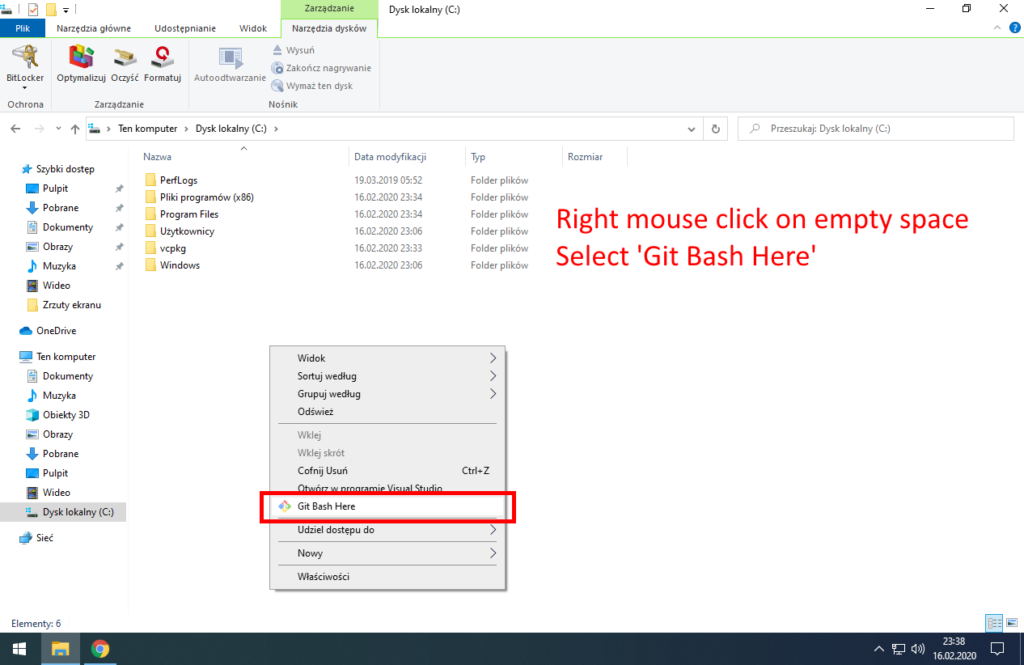
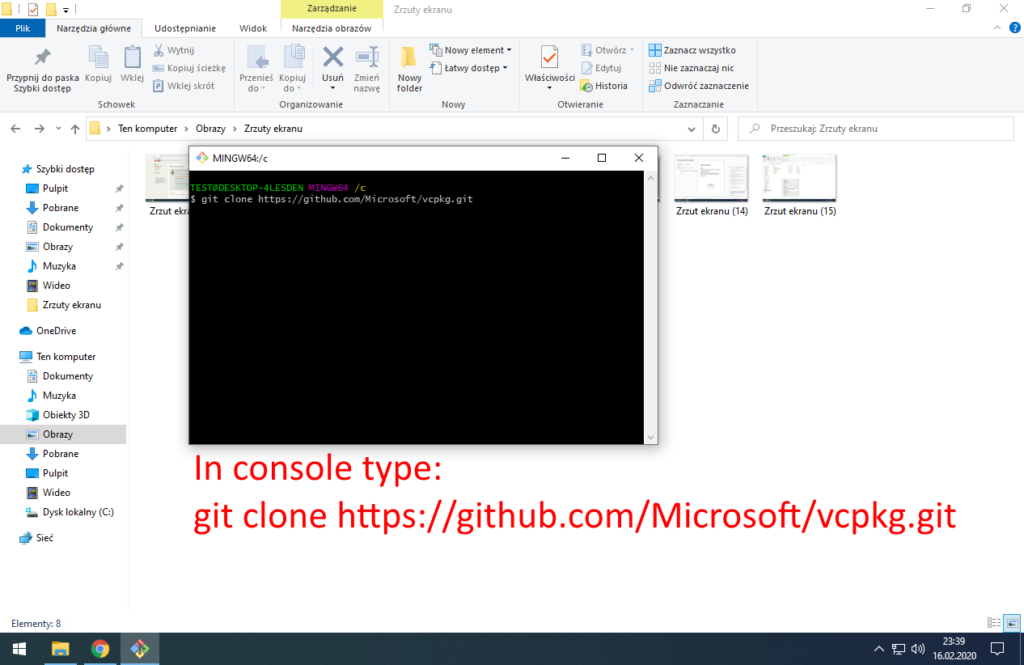
git clone https://github.com/Microsoft/vcpkg.git
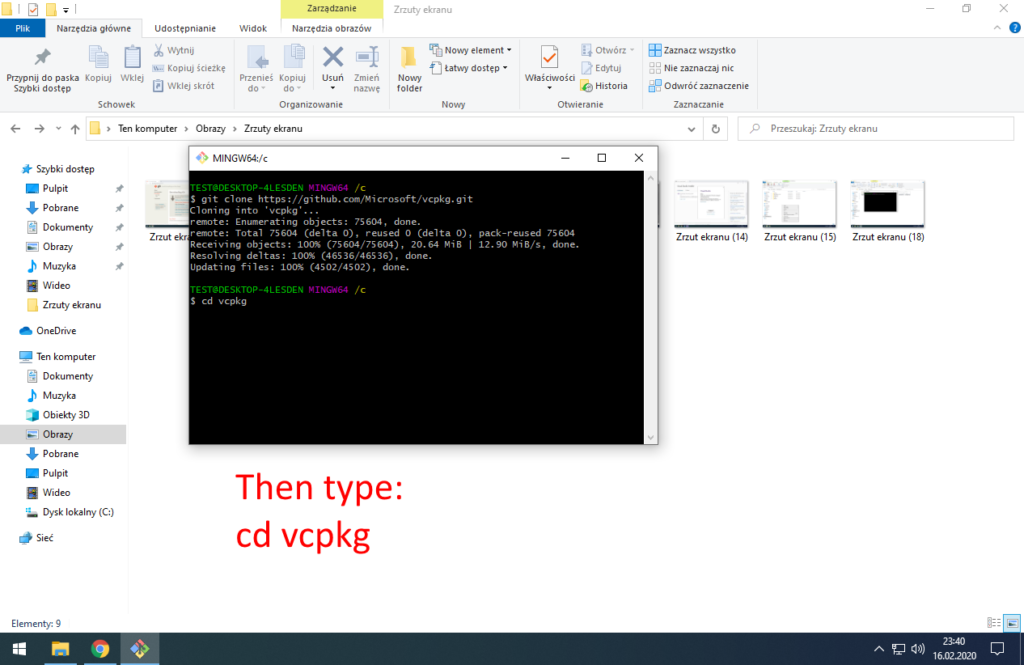
cd vcpkg
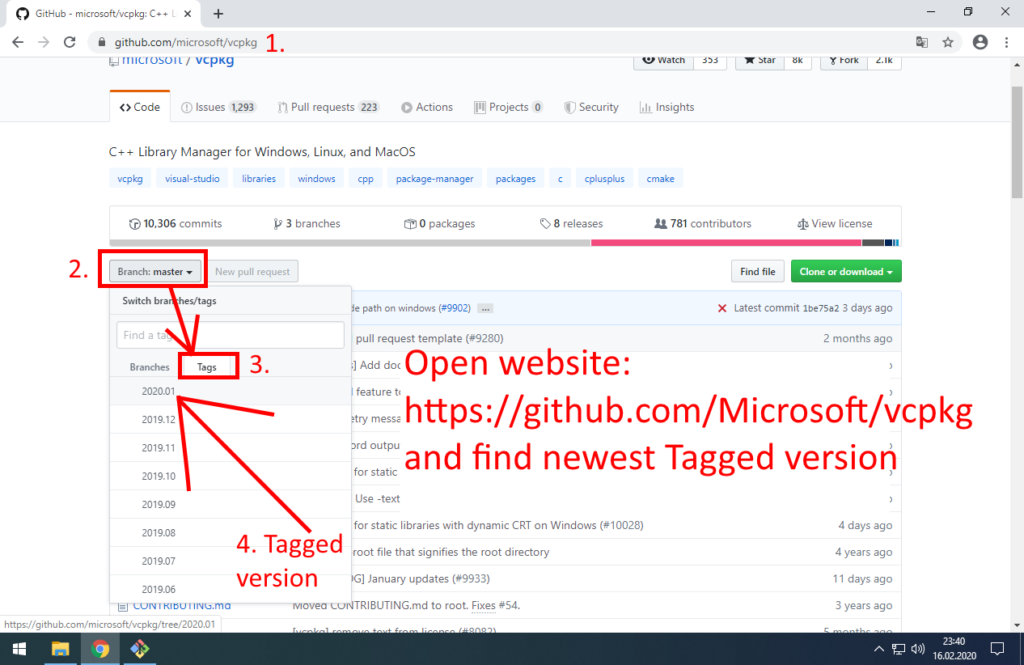
Link: https://github.com/Microsoft/vcpkg
Newest tagged version should be stable. I tried master branch and it did not work with all libraries. You can always use old version, not newest. I used for this tutorial: 2020.01
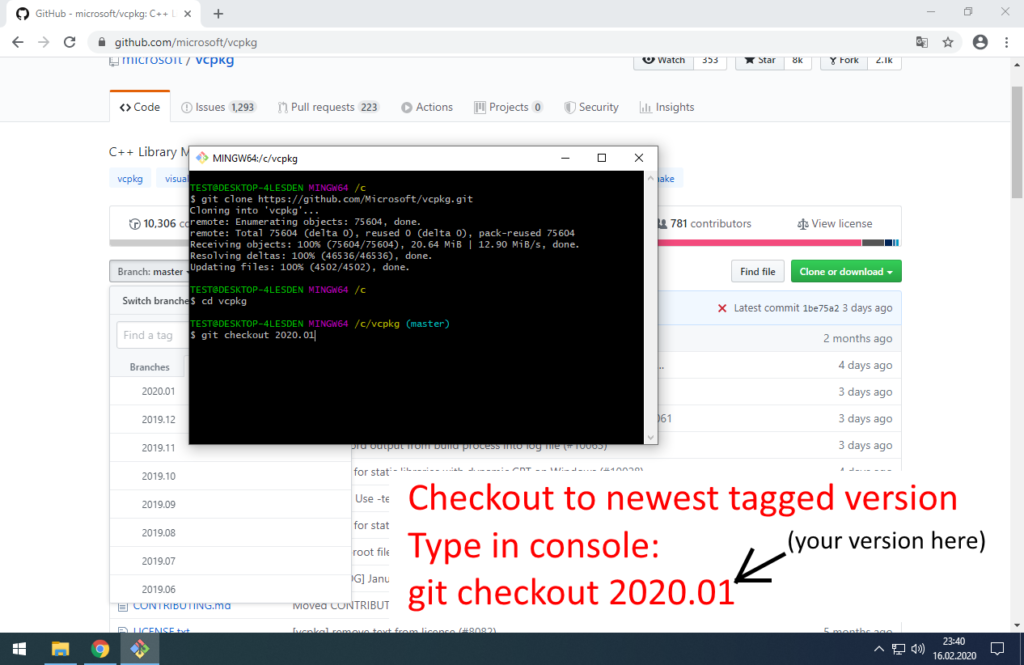
git checkout 2020.01
It will switch version of vcpkg to version from 2020.01
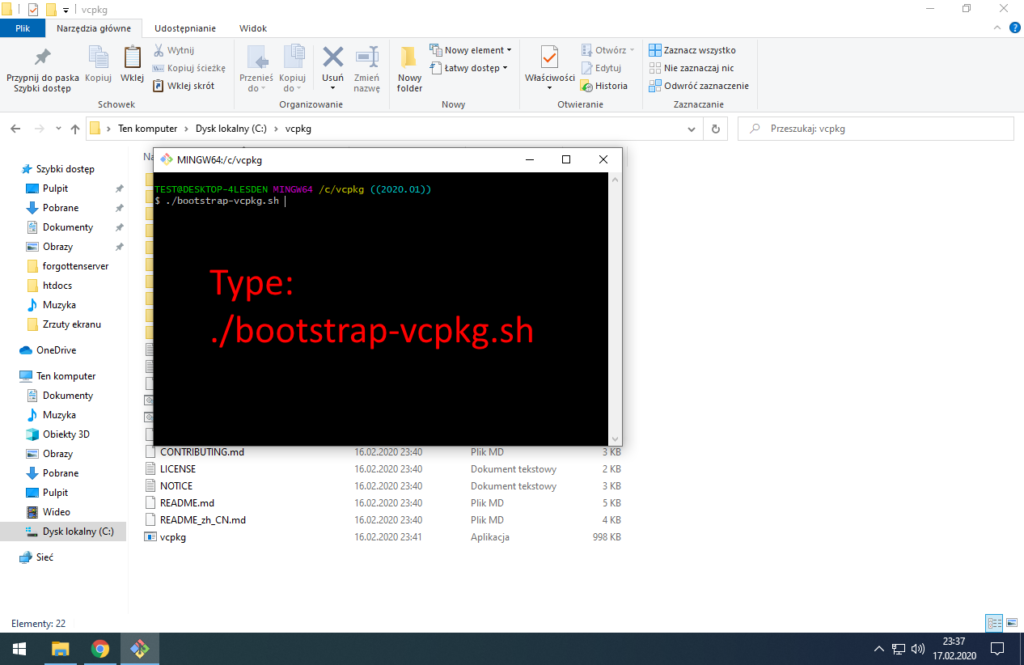
./bootstrap-vcpkg.bat
To build vcpkg. You must do it after downloading from GitHub and after every version change.

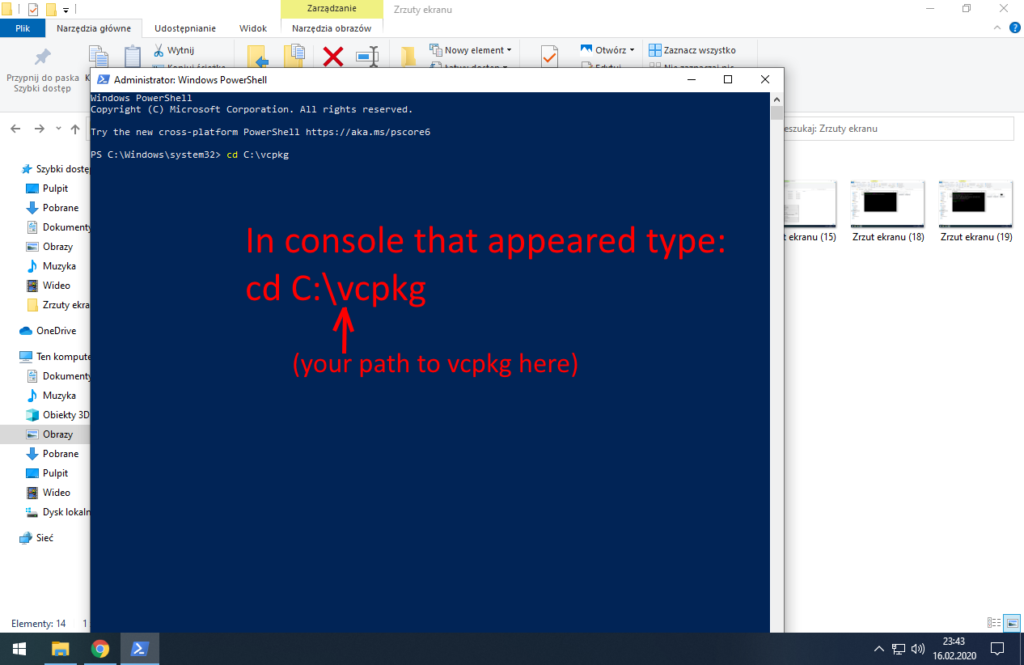
Type: cd C:\vcpkg
cd C:\vcpkg
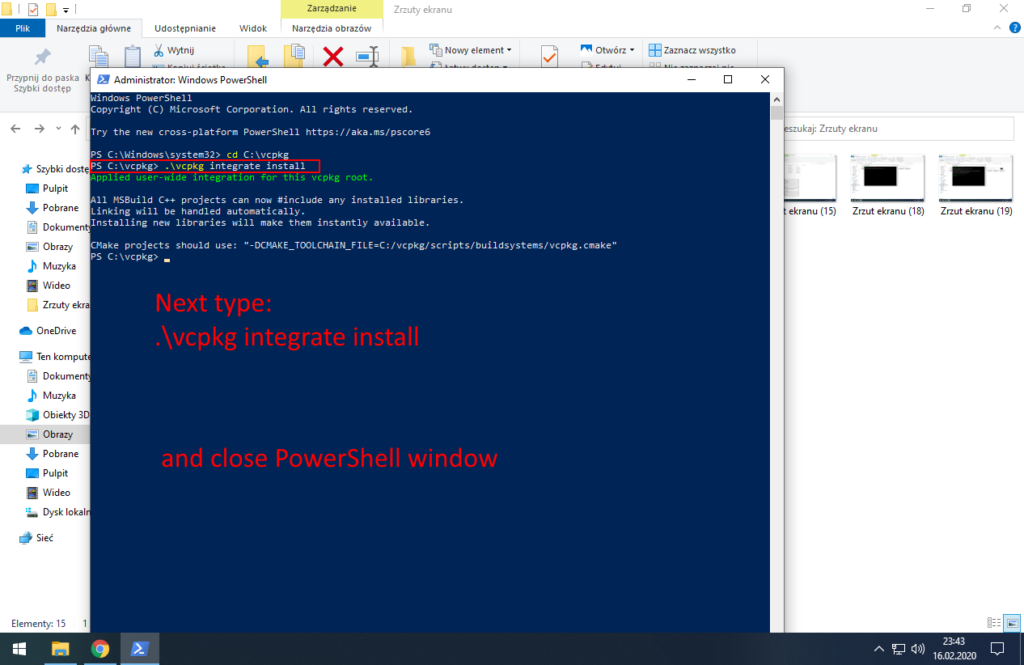
.\vcpkg integrate install
This will integrate vcpkg C++ library manager with Visual Studio we installed before.
After integrating with Visual Studio close PowerShell. We don’t need administrator rights anymore.
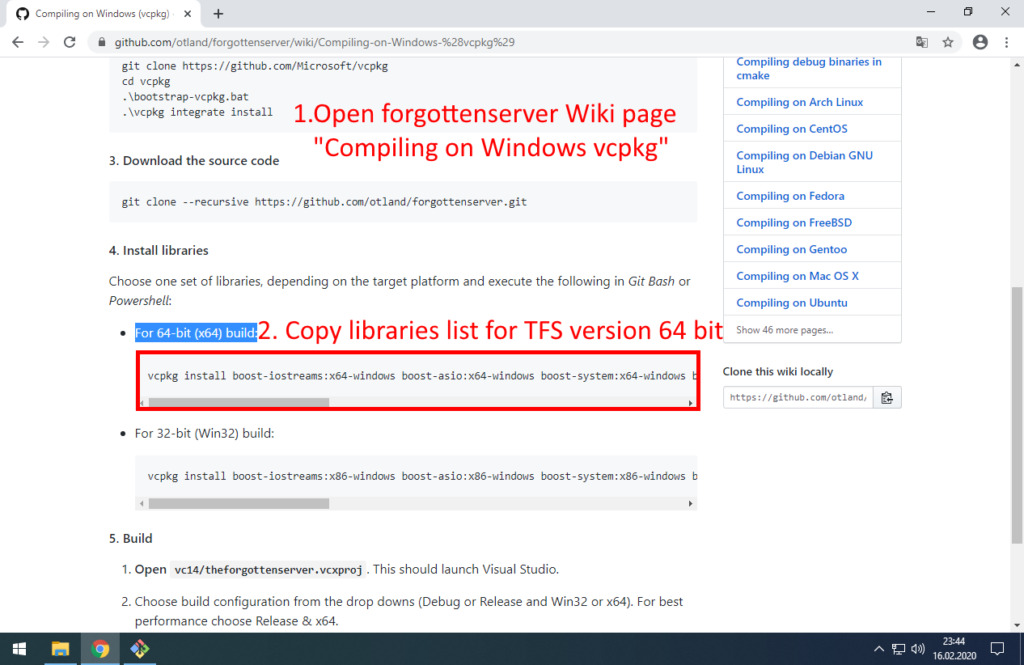
Libraries list at 2020-02-17:
vcpkg install boost-iostreams:x64-windows boost-asio:x64-windows boost-system:x64-windows boost-filesystem:x64-windows boost-variant:x64-windows boost-lockfree:x64-windows luajit:x64-windows libmariadb:x64-windows pugixml:x64-windows mpir:x64-windows cryptopp:x64-windows
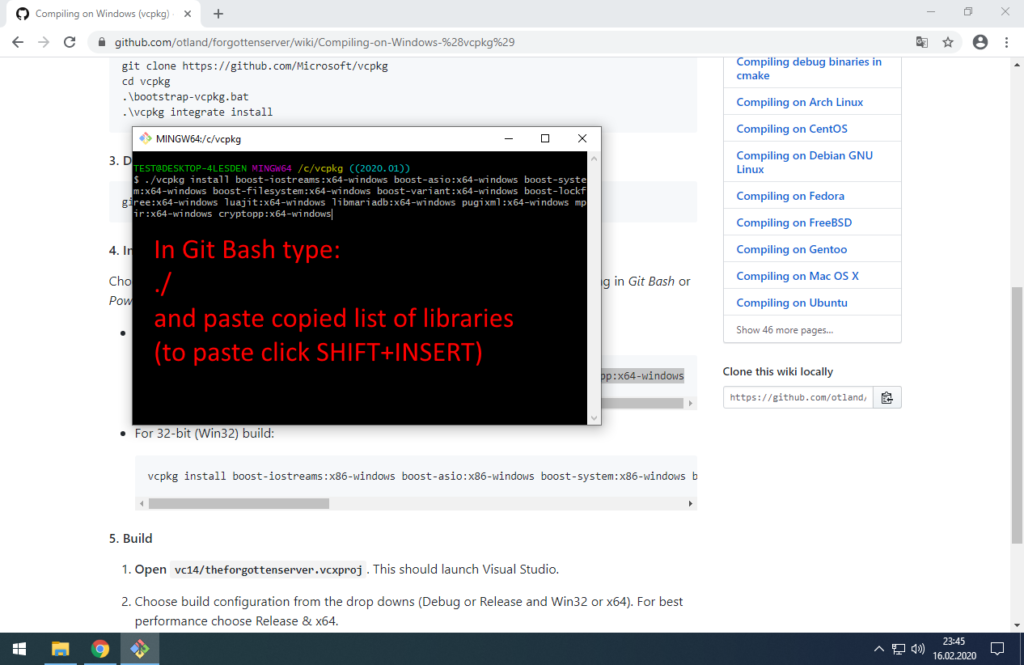
./ means ‘run’
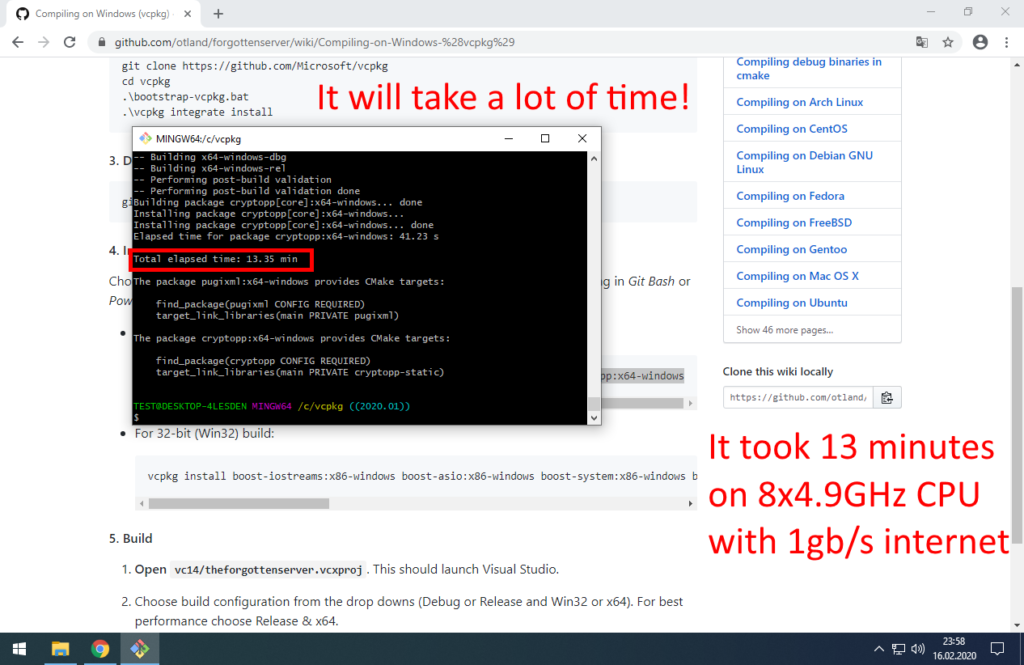
We got all libraries for TFS!
4. Download TFS and compile engine
Create folder:
C:\ots
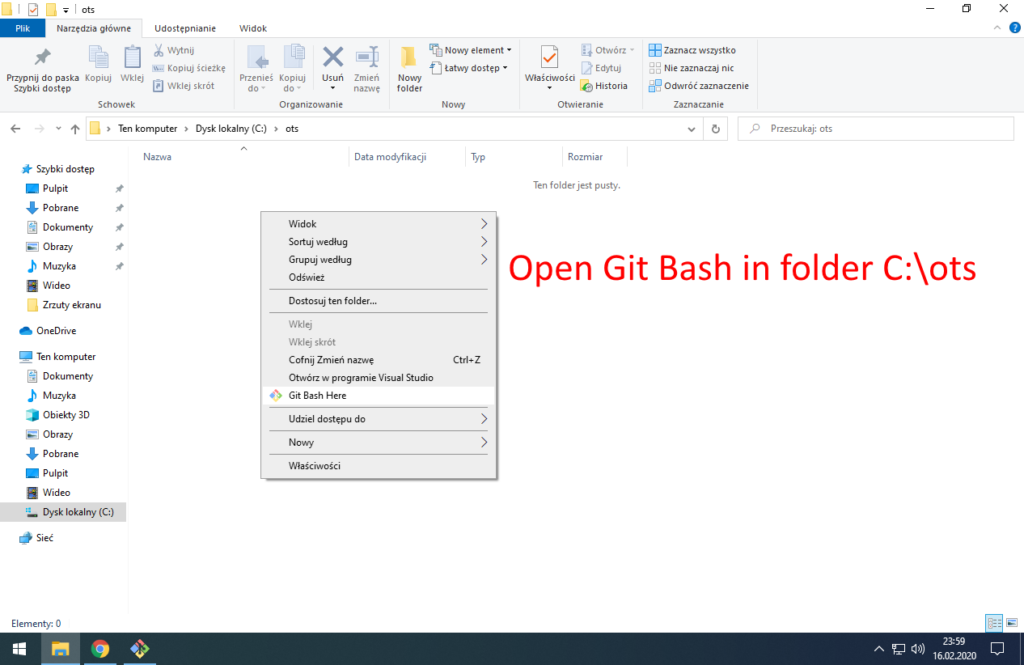

git clone https://github.com/otland/forgottenserver.git

C:\ots\forgottenserver\vc14\theforgottenserver.sln
It will open TFS project in Visual Studio.
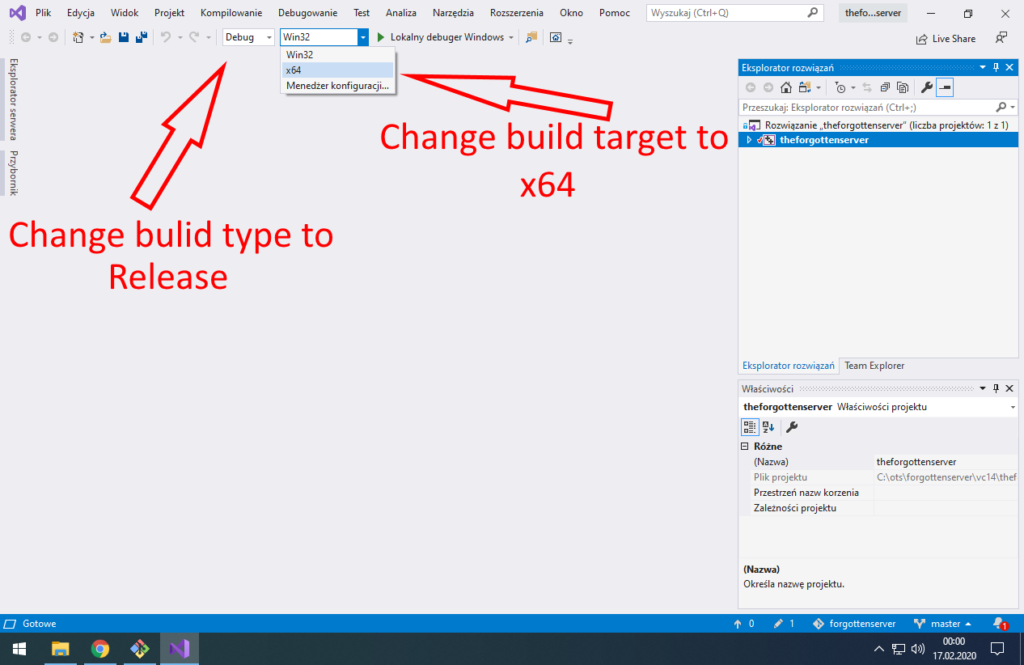
Previously we installed C++ libraries for 64-bit platform – we can compile only 64-bit version.
If you plan to do many changes in sources and compile in often, you may try to use Debug build type.
It should link faster and reduce time of building solution.
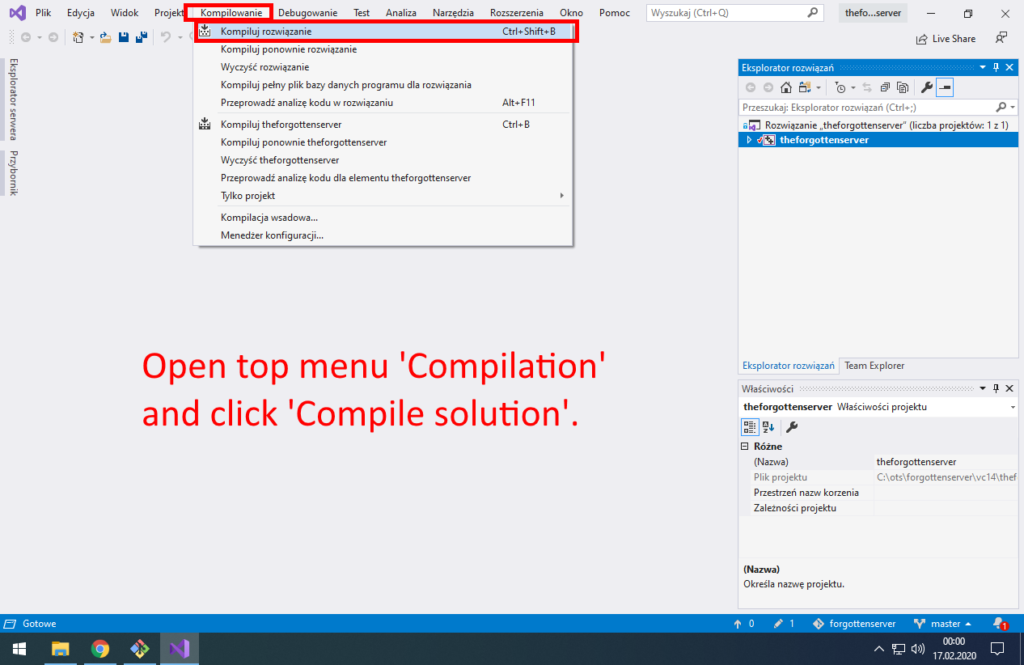
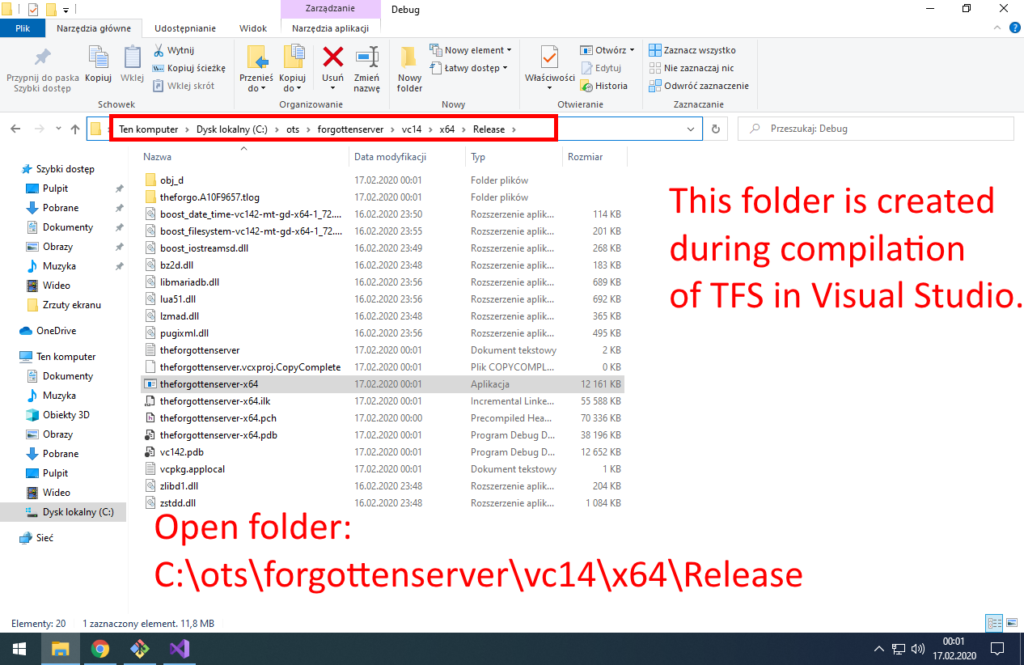
C:\ots\forgottenserver\vc14\x64\Release
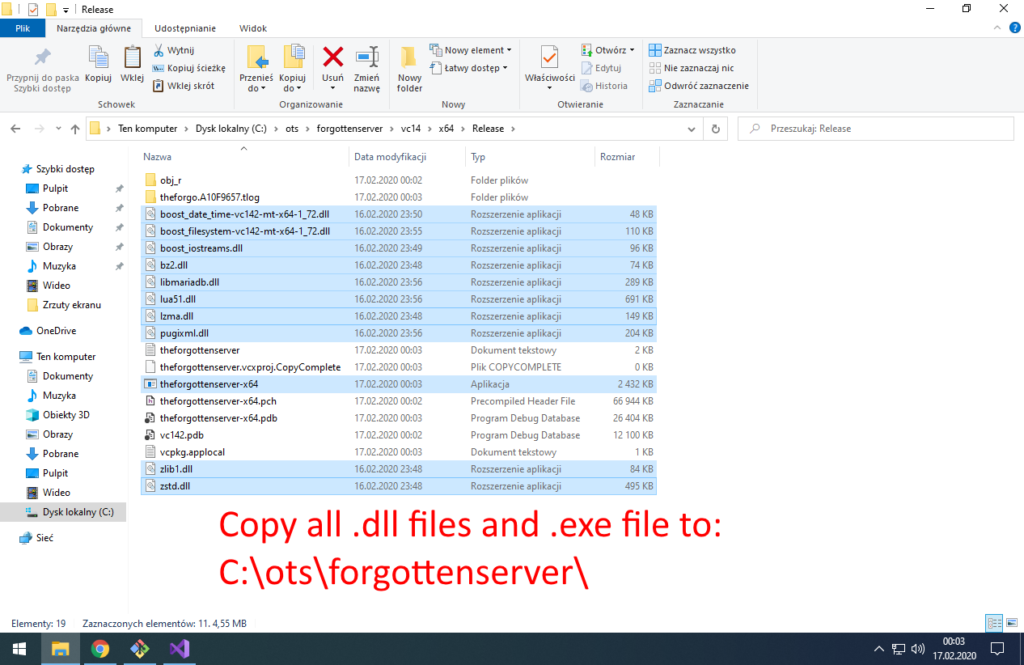
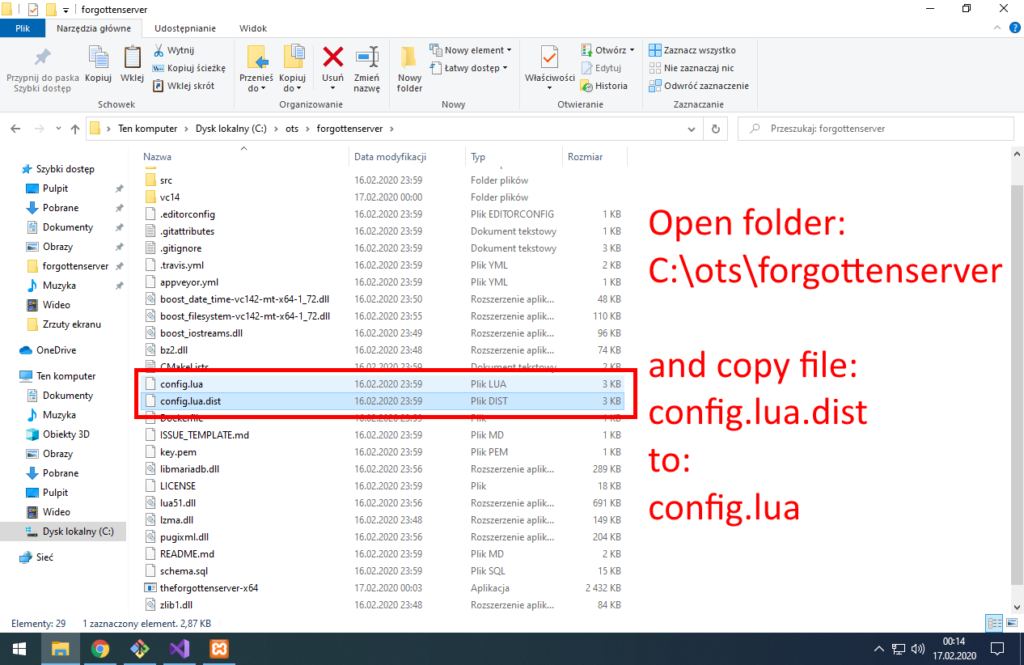
C:\ots\forgottenserver\
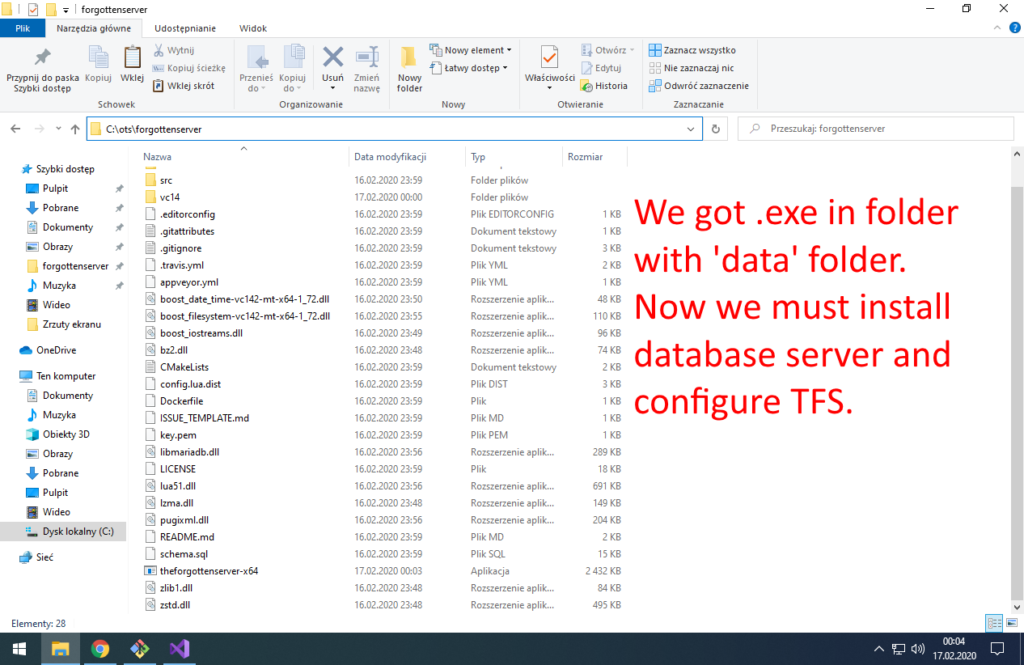
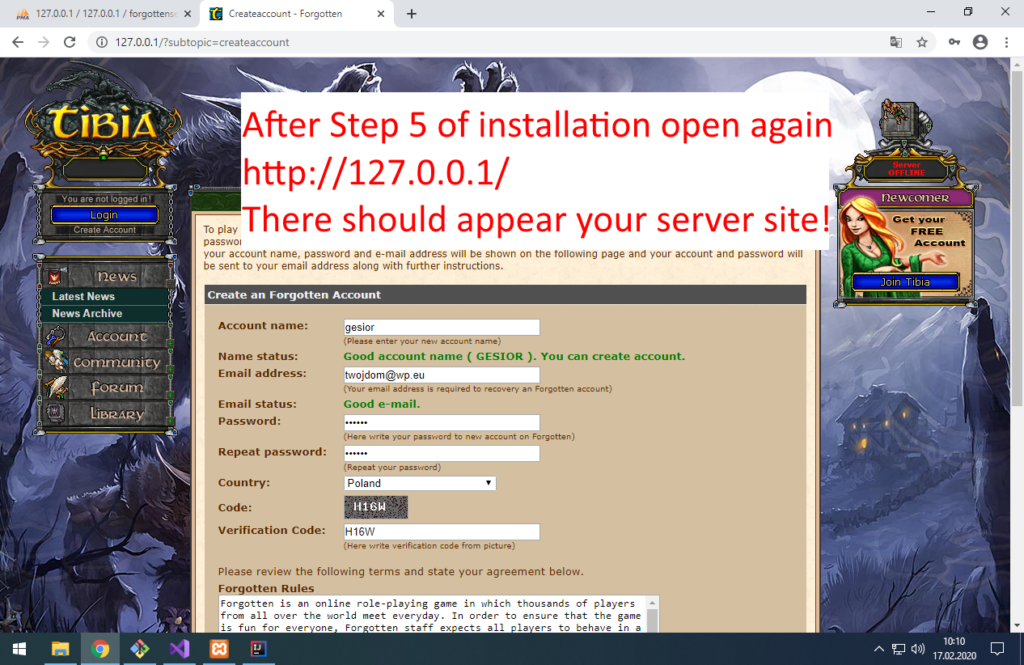
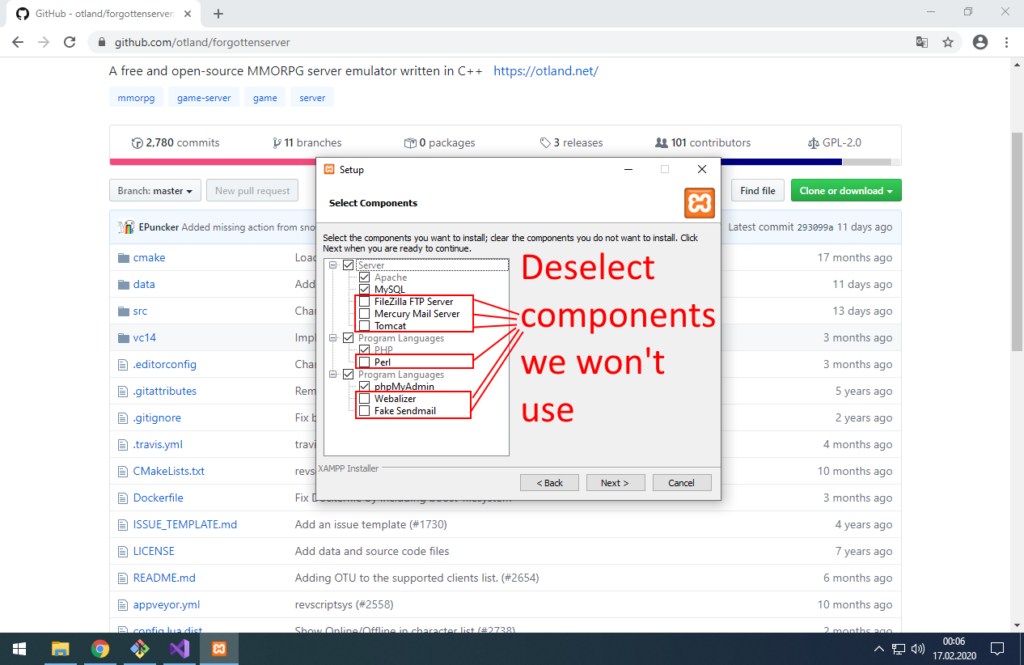
5. Install MariaDB, PHP and Apache2 servers
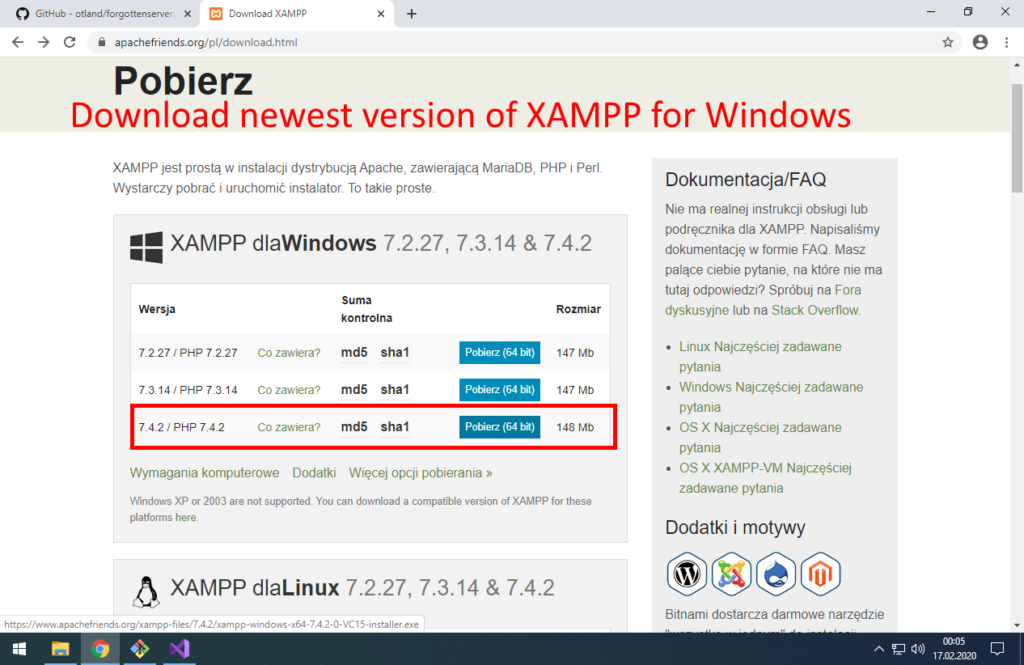
Link: https://www.apachefriends.org/download.html
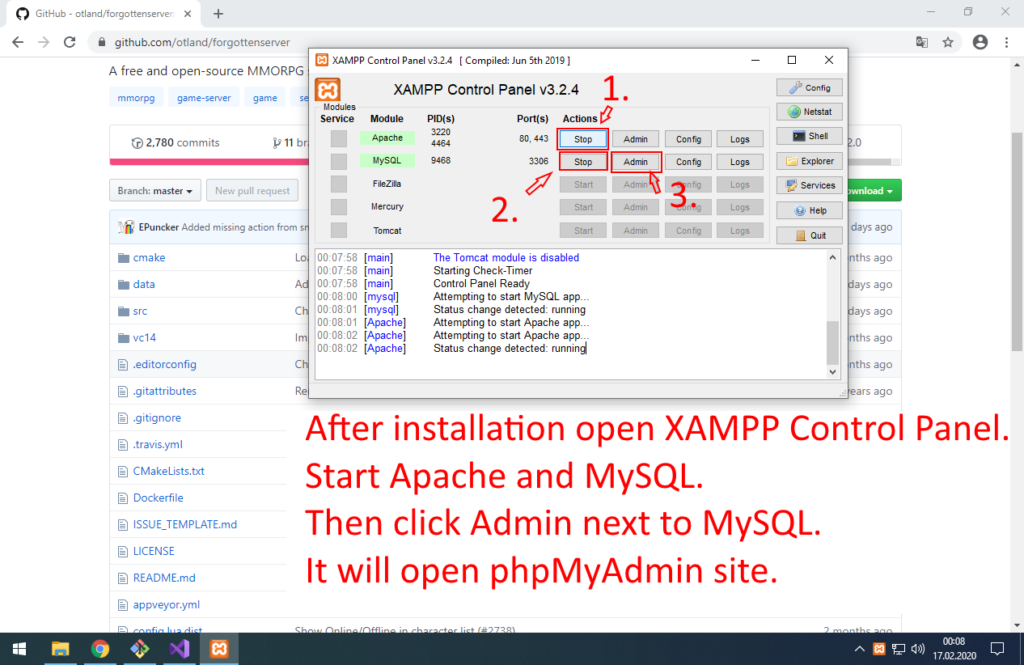
If Apache fails to start, it’s probably because some other application is already using port 80.
Common problem is Skype. Turn off Skype, start Apache, start again Skype – you got website and Skype working.
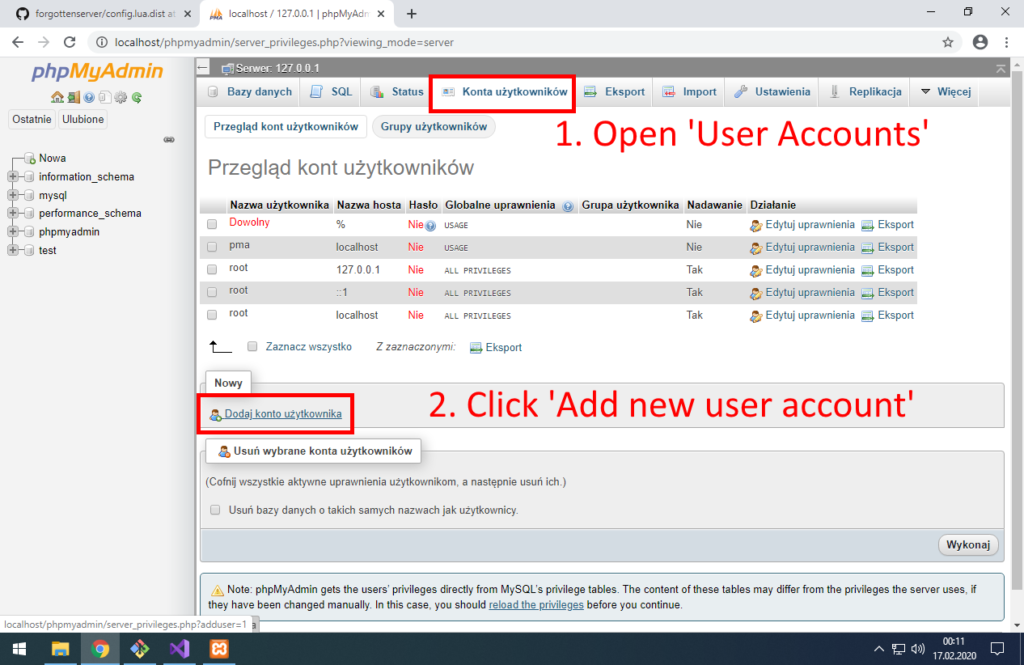
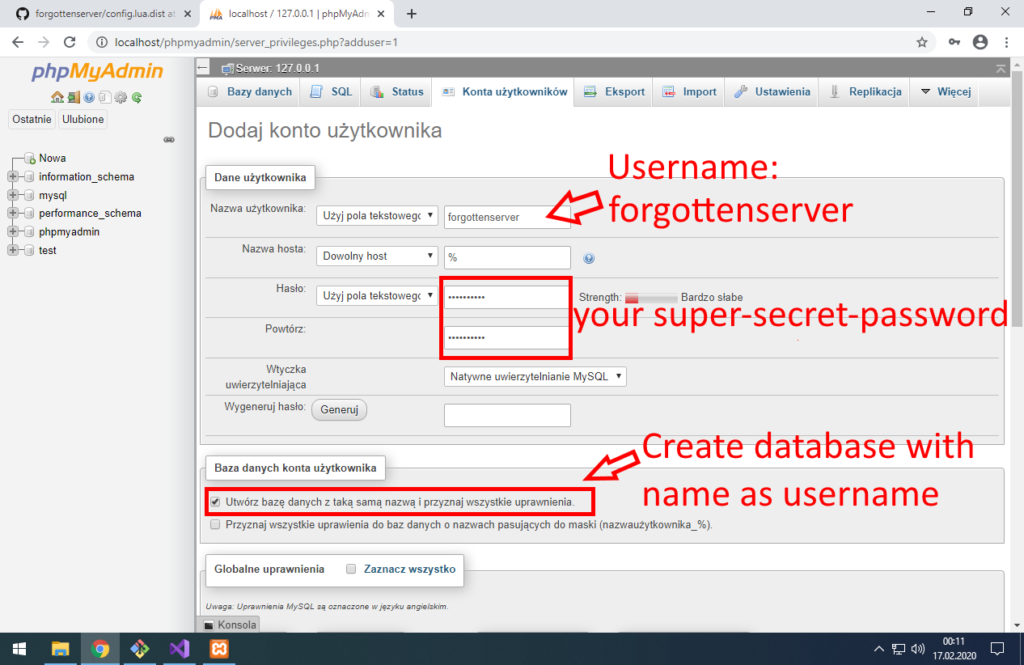
Type secure password for that user
Check ‘Create database with same name and grant all access.’
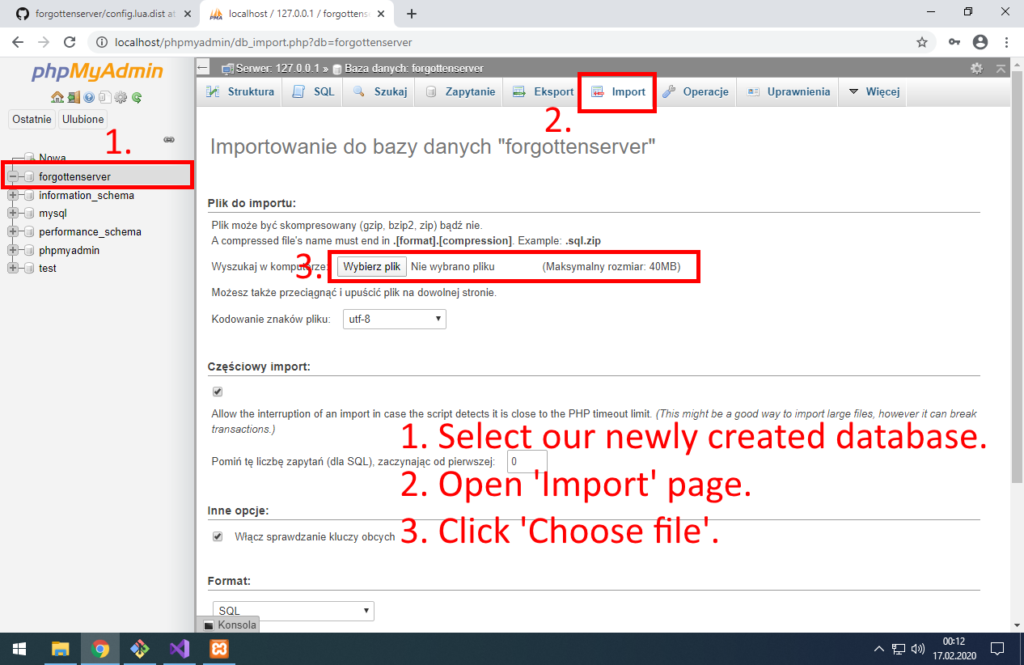
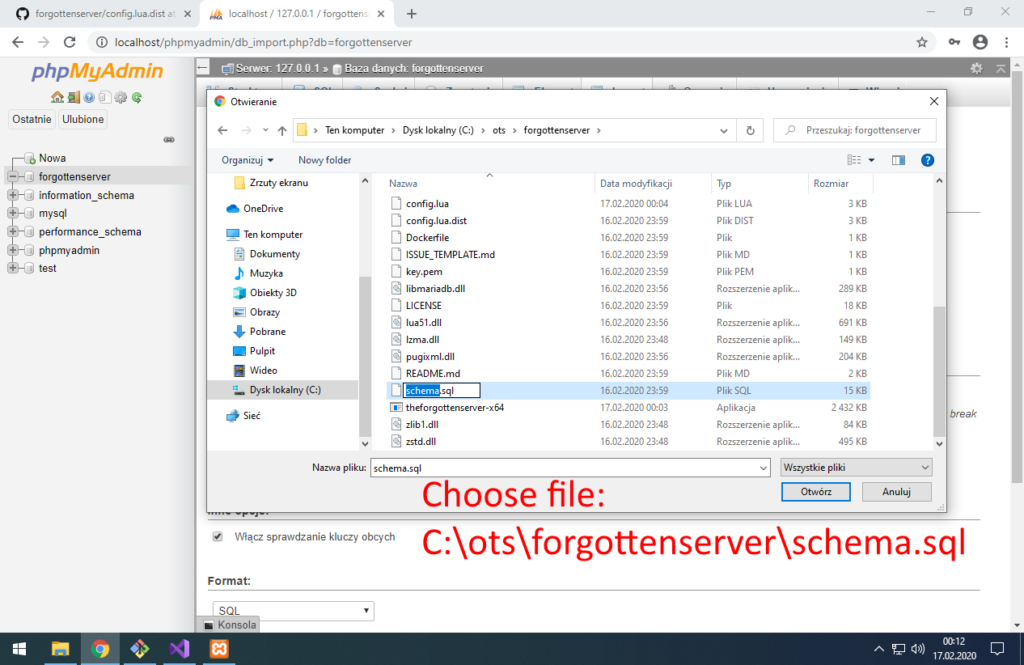
C:\ots\forgottenserver\schema.sql
and click Import.
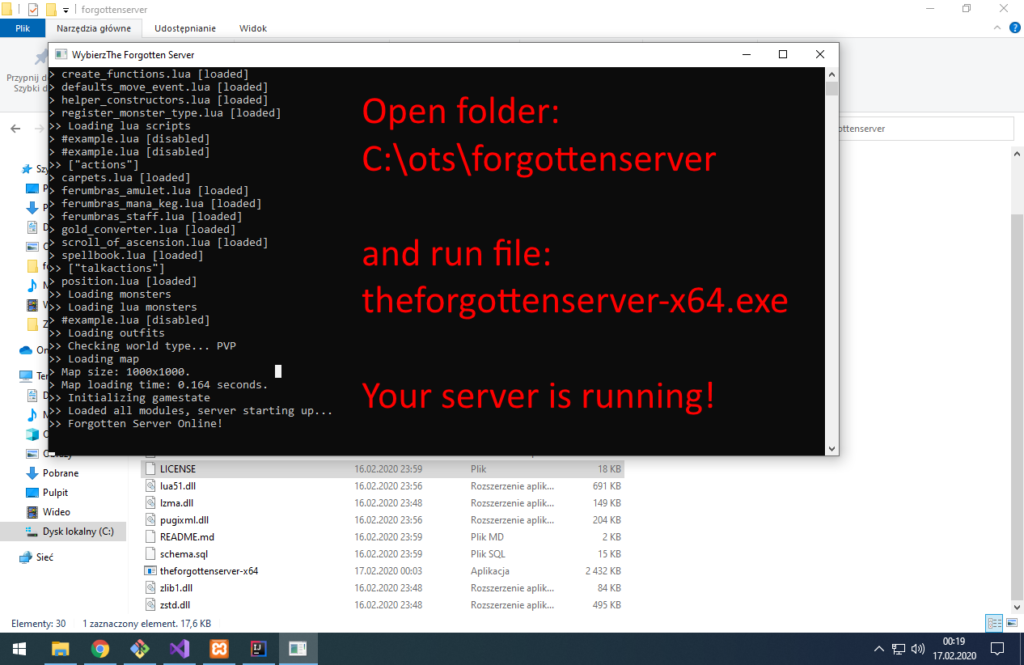
We got database for our OTS! Time to configure game server.
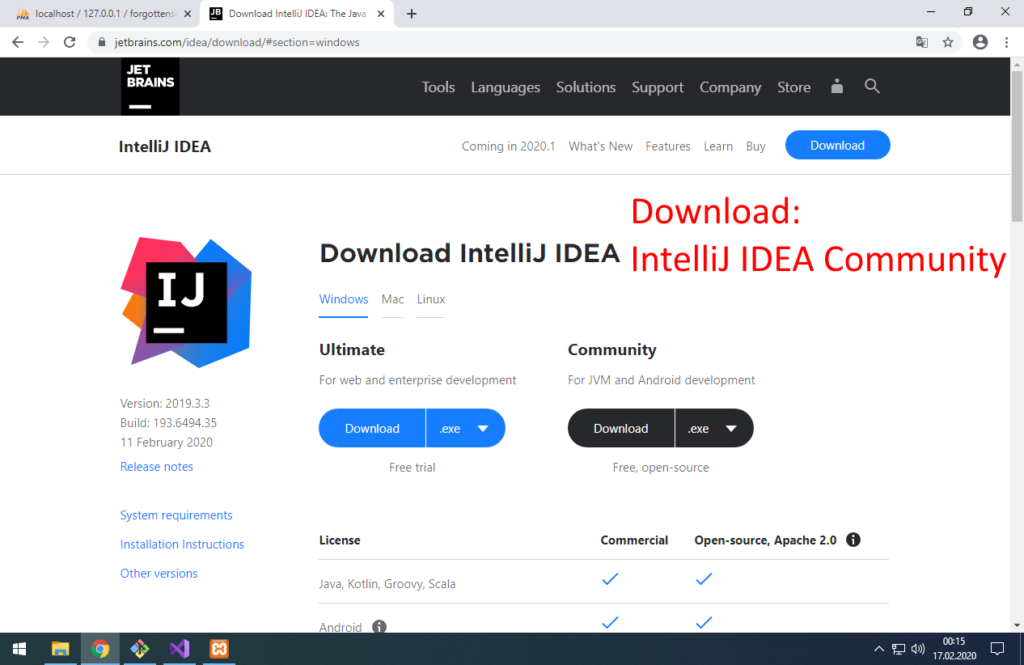
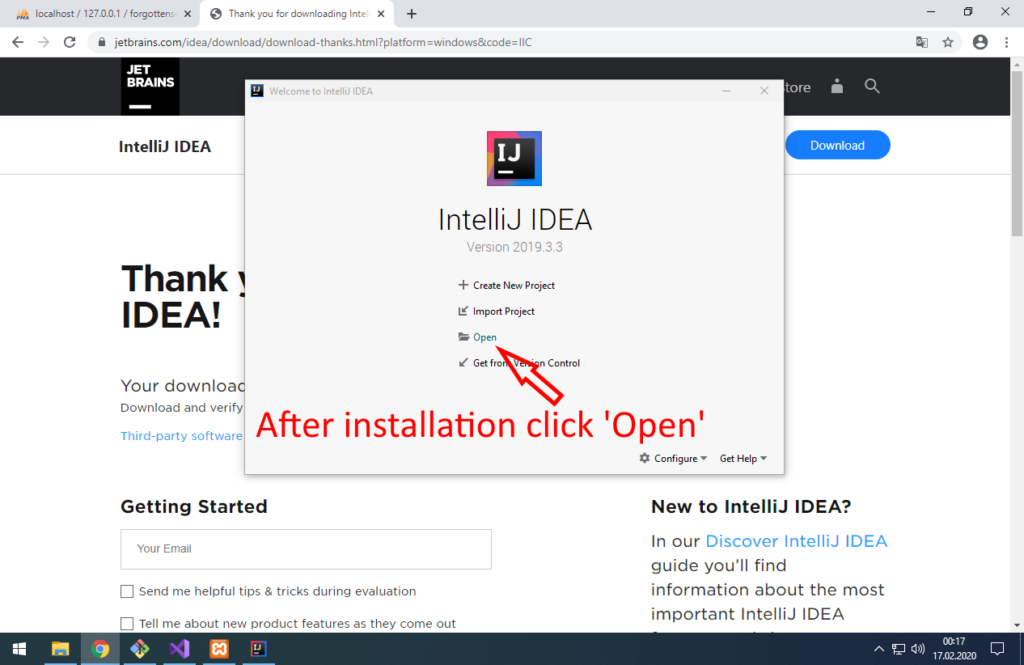
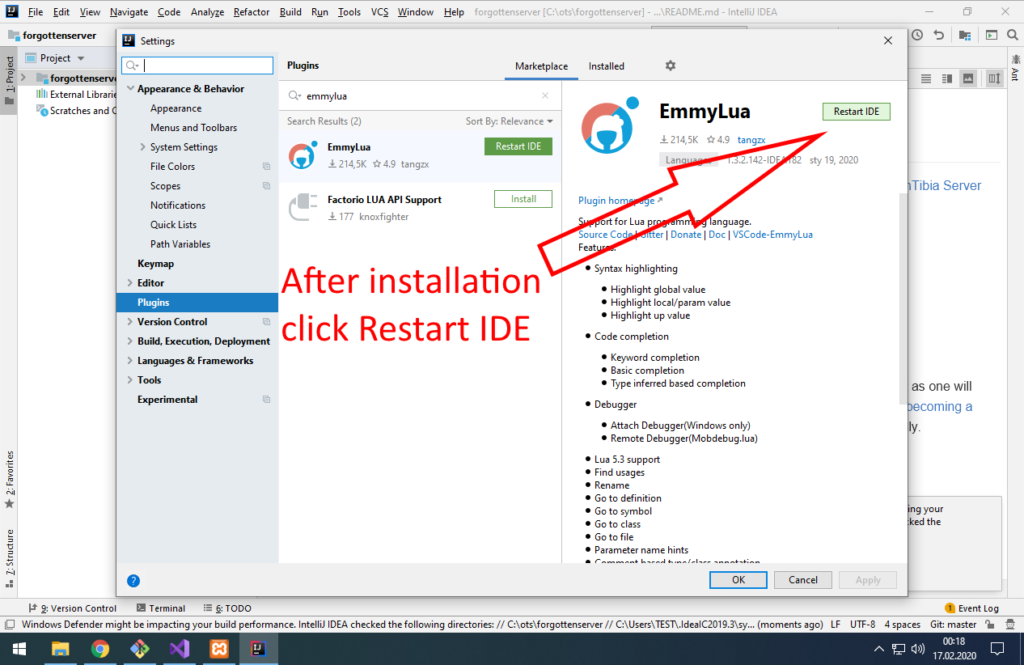
6. Install IntelliJ IDEA, configure game server and run it for first time!
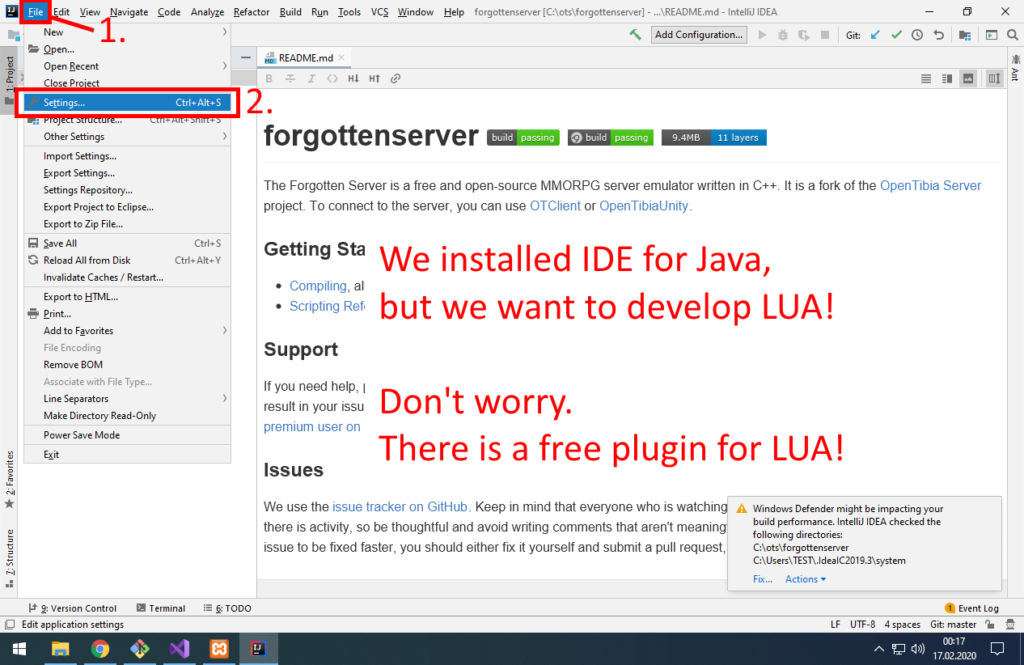
What is IntelliJ IDEA? It’s IDE for Java and Android development.
What is IDE? It’s ‘Integrated Development Environment’.
Why do I need it? To develop code faster, automatically detect simple bugs and make cleaner code.
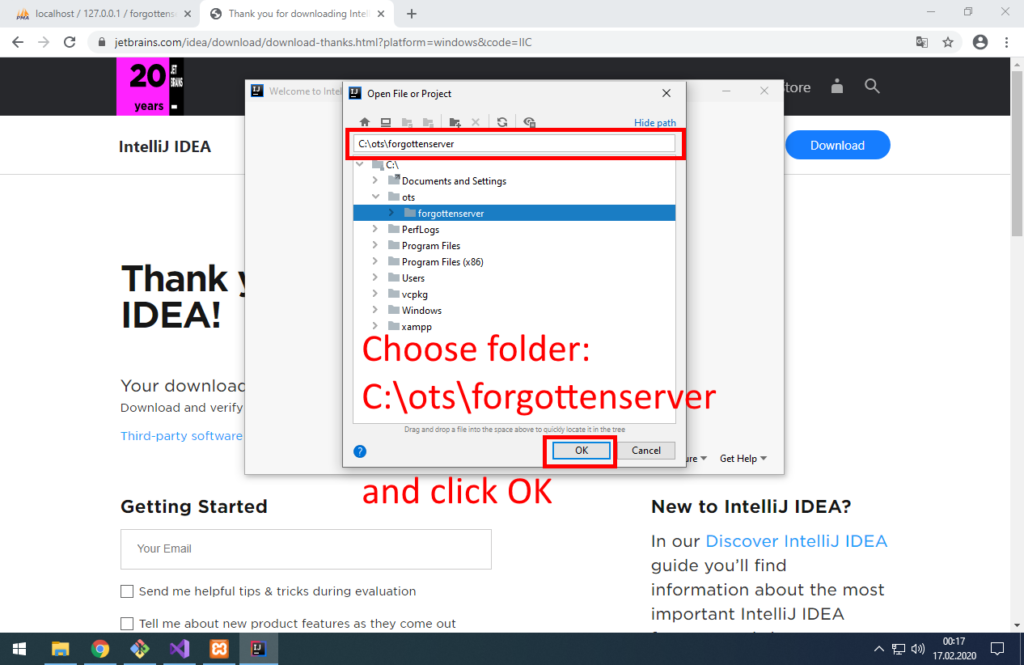
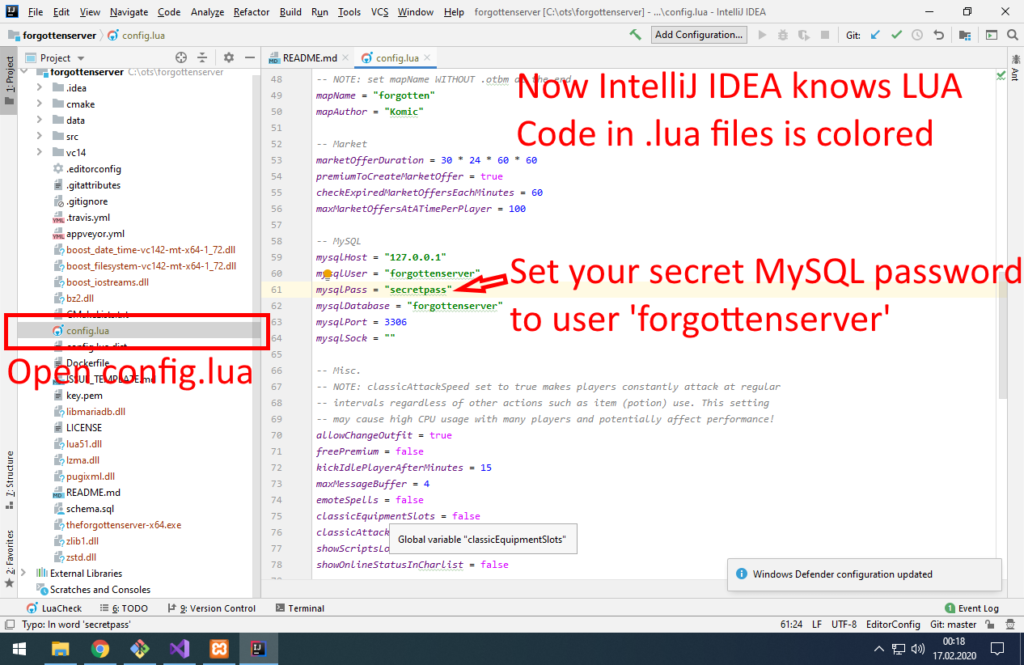
C:\ots\forgottenserver
7. Install website (Gesior2012)

C:\xampp\htdocs
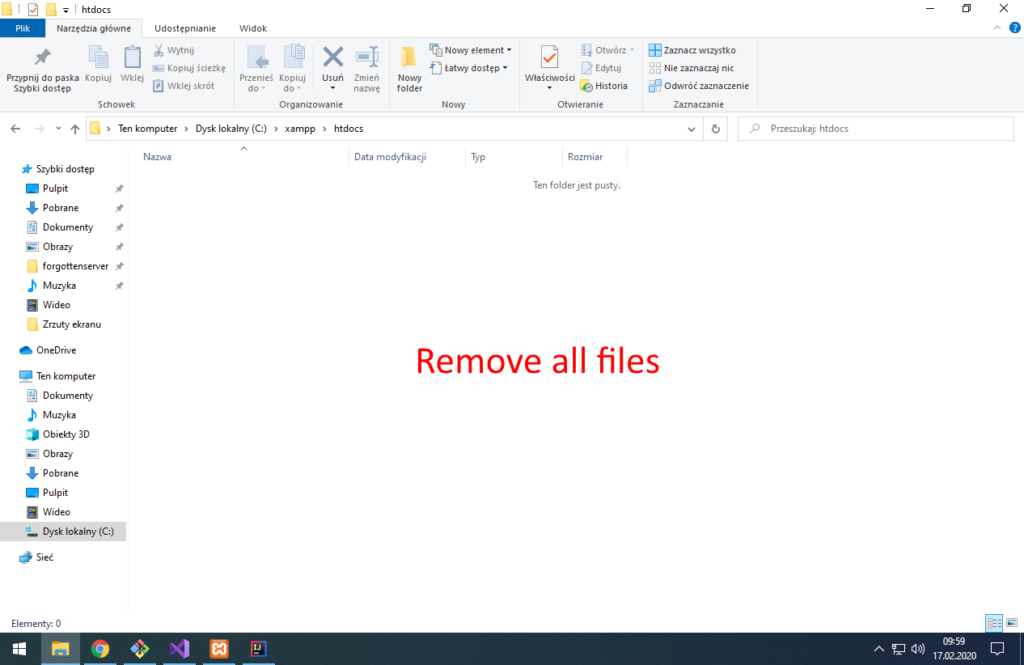

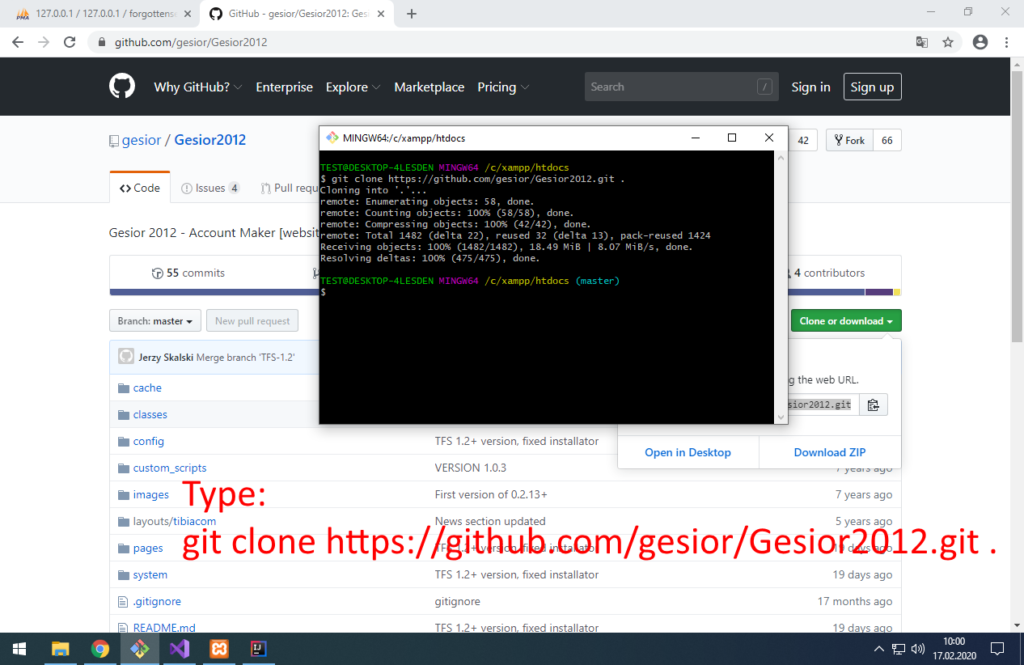
git clone https://github.com/gesior/Gesior2012.git .
Yes. There is space and dot at end. We want to download Gesior2012 to current folder. Not to folder C:\xampp\htdocs\Gesior2012
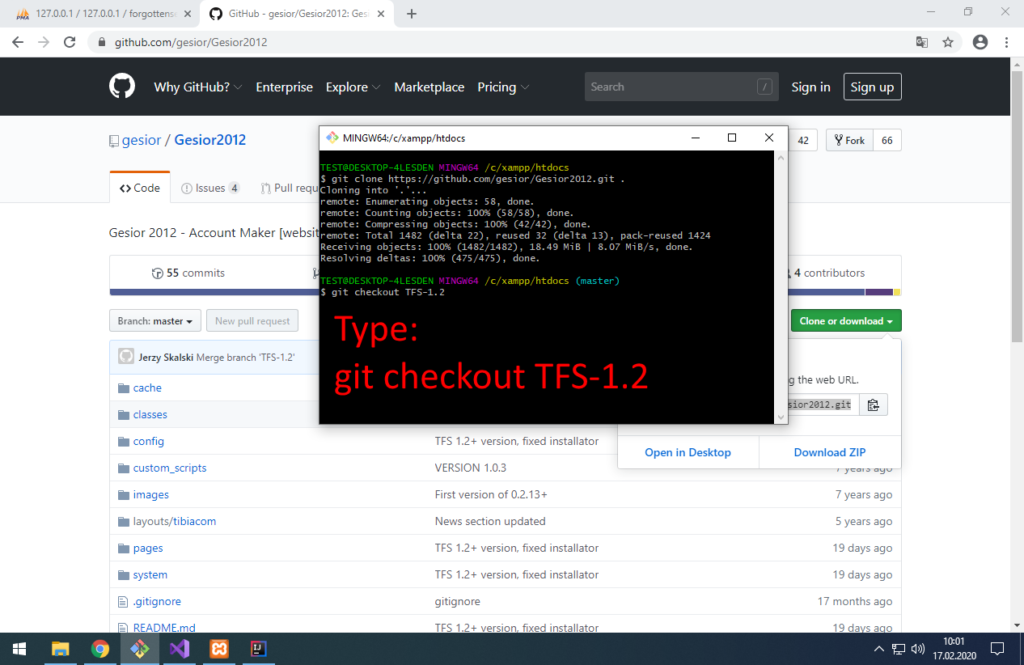
git checkout TFS-1.2
Change Gesior2012 version to TFS-1.2 (exactly change git branch to TFS-1.2)
Same as we did during vcpkg installation. Download from GitHub with git clone and then change version.
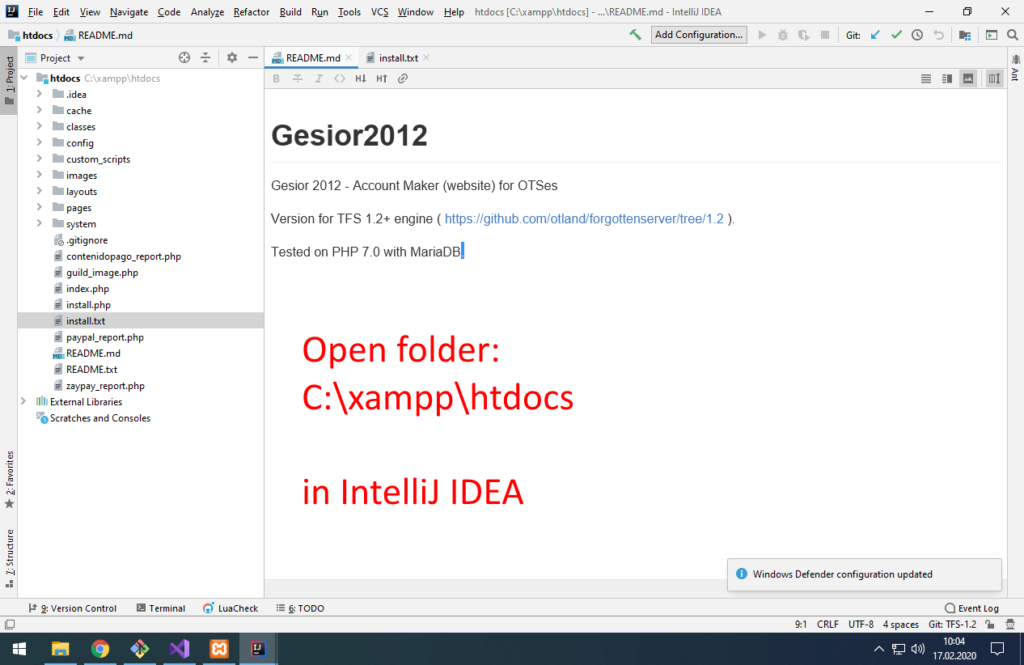
PHP files are not colored in IntelliJ IDEA Community edition 🙁
LUA plugin is free, but PHP is available only in IntelliJ IDEA Ultimate (paid / 30 days trial) or as separate application PHPStorm (it’s IntelliJ IDEA with PHP plugin).

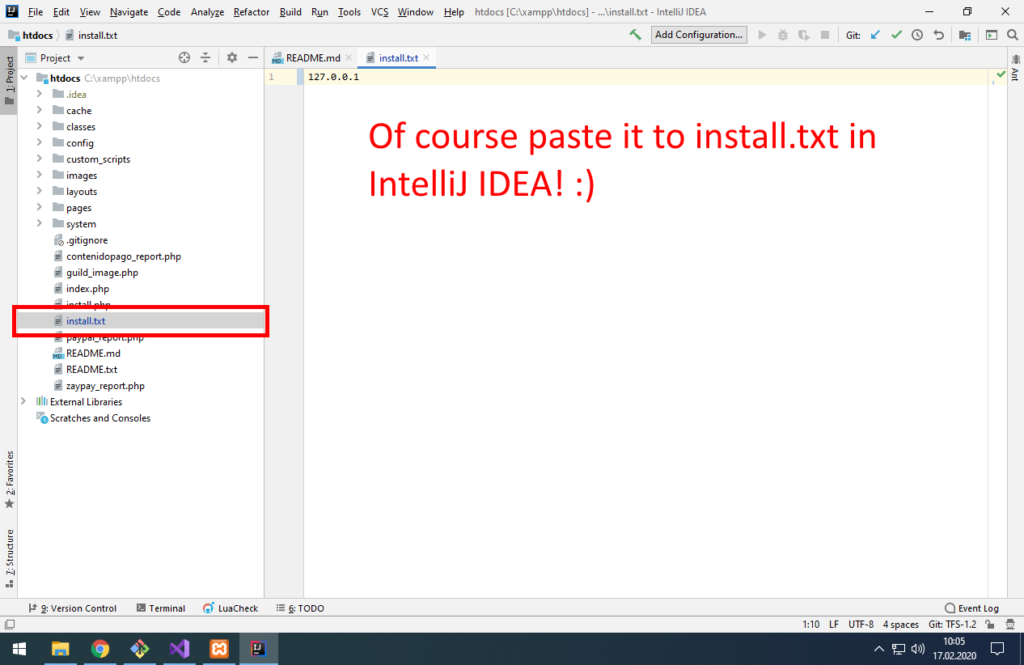
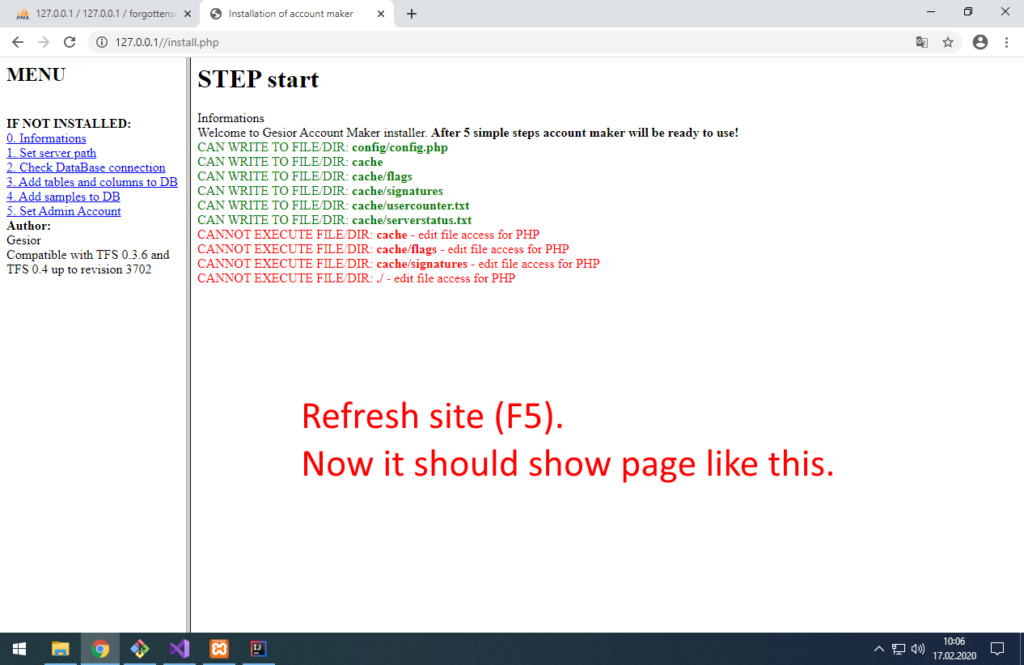
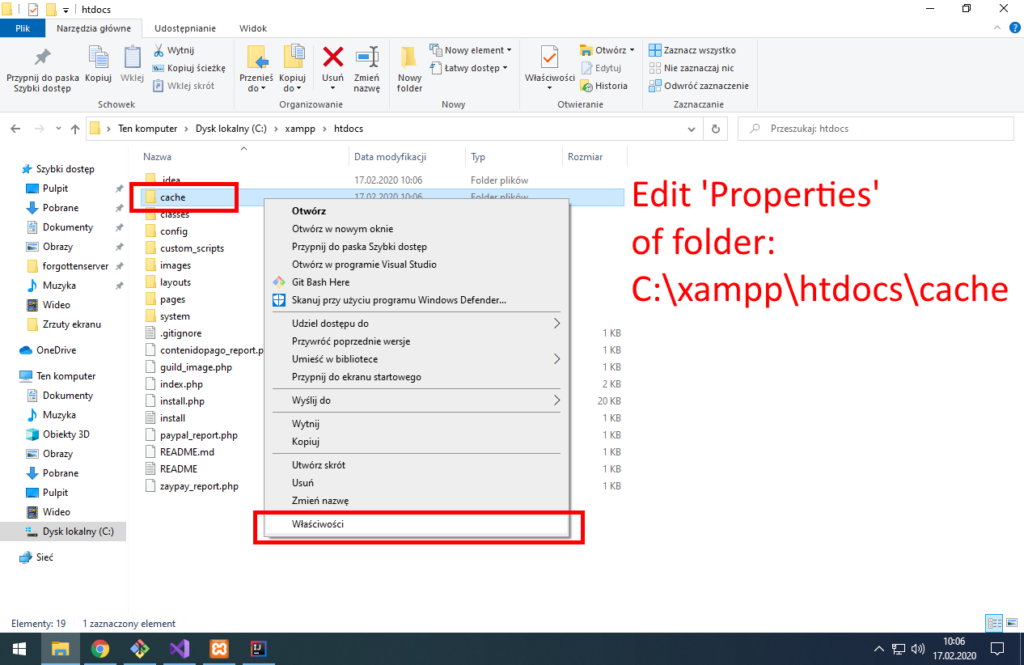
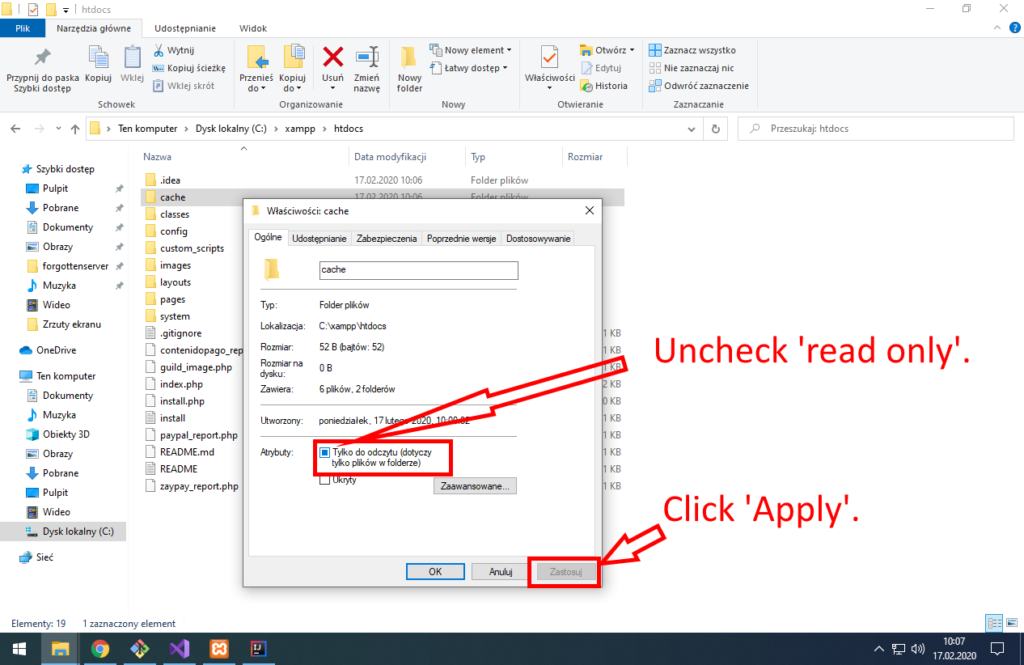
There will be probably some errors about cache folder.
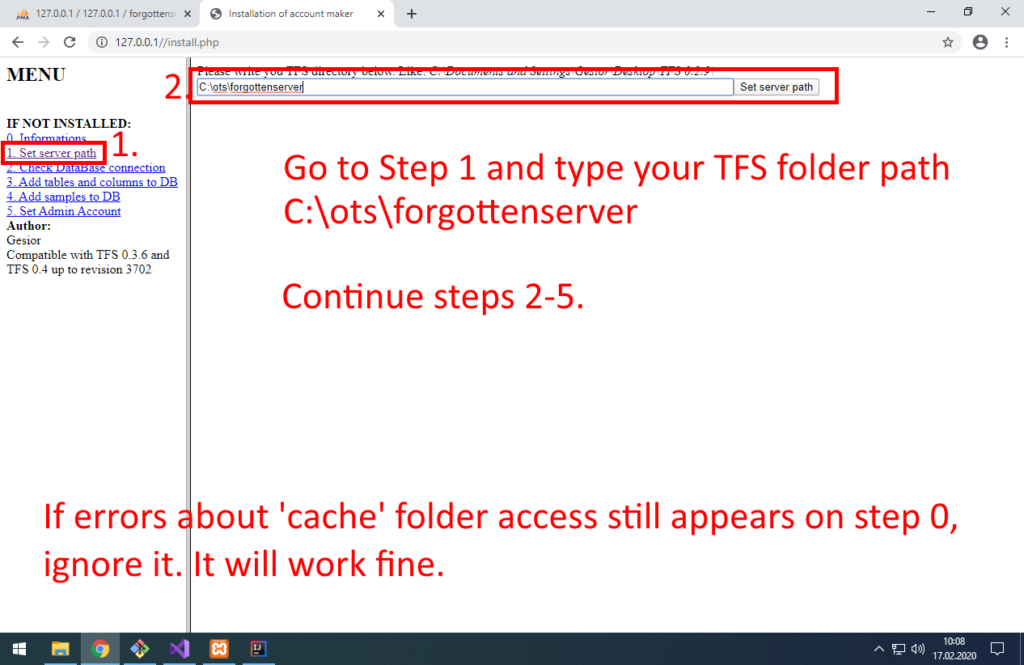
Type path to TFS: C:\ots\forgottenserver
C:\ots\forgottenserver
Continue steps 2-5.